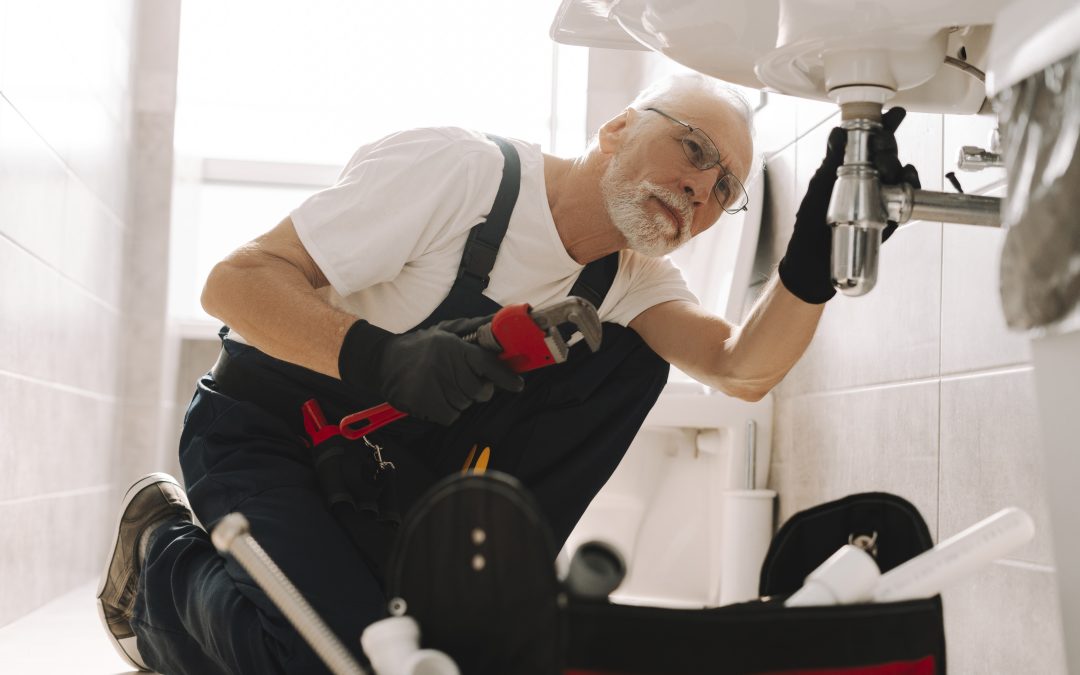
by RSP Crew | Jun 7, 2025
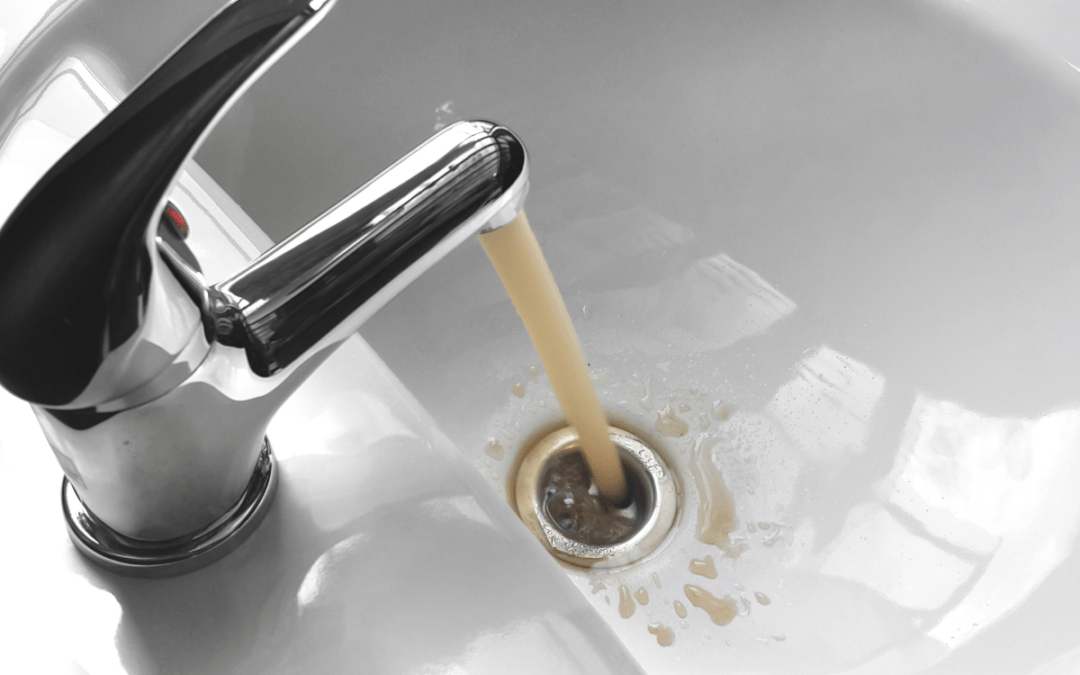
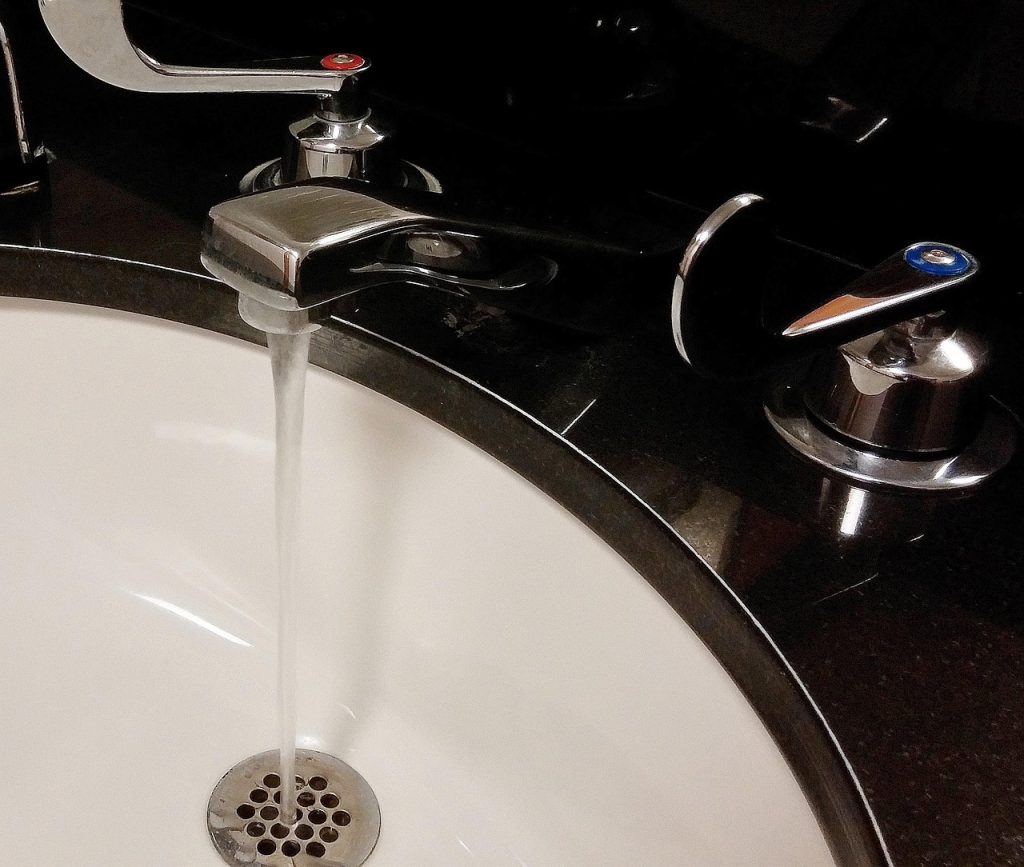
Turning on the tap and seeing brown water is never a pleasant surprise. For many Australians, this can be an unsettling experience, raising questions about safety, causes, and what steps to take next. Whether it’s a one-off event or a recurring issue, understanding why your tap water is brown can help you decide what to do and when to call in the experts.
Introduction: Understanding Discoloured Water
Discoloured water is a common concern for many Australian homeowners, but understanding the reasons behind it can help you address the issue quickly and effectively. While Australia is known for its high standards of drinking water, occasional water discolouration can still occur—most often as an isolated problem within a single property rather than a widespread issue with the local water supply.
The most frequent causes of discoloured water include issues with internal pipes, sediment build-up in water pipes, or rusted sections of your property’s plumbing. Over time, sediment can accumulate in pipes, and if disturbed, it may cause your tap water to appear brown or cloudy. Internal plumbing problems, such as corroded pipes or old fittings, can also lead to water discolouration. Identifying whether the problem stems from your internal pipes or the broader water supply is crucial for finding the best solution and ensuring your drinking water remains safe. Regular maintenance of your property’s pipes and plumbing system is one of the most effective ways to prevent discoloured water and protect your water quality.
Types of Discoloured Water
Discoloured tap water can show up in several different ways, each with its own likely cause. Brown tap water is one of the most common types and is usually the result of rust or iron particles entering the water supply, often from older pipes or after maintenance work. Yellow or orange water can also be caused by iron or manganese, which may be present in the water supply or released from pipes as they age.
Cloudy or milky water, on the other hand, is typically due to harmless air bubbles trapped in the water. This can happen after maintenance work on the water network, such as pipe repairs or fire hydrant testing, which introduces air into the pipes. When you fill a clear glass with this water, you’ll often see the cloudiness clear from the bottom up as the air bubbles rise and escape. While this type of discolouration is usually not a health concern, it can be unsettling to see.
In some cases, cloudy water may be linked to corroding copper pipes, which can be a more complex issue requiring the expertise of a licensed plumber. If you notice persistent cloudy water, especially if it’s accompanied by a blue or green tint, it’s important to seek professional advice to improve your water quality and prevent further damage to your pipes.
By recognising the different types of discoloured water—whether it’s brown, yellow, orange, cloudy, or milky—you can better identify the underlying cause and take the right steps to resolve the issue, ensuring your tap water remains safe and clear.
Is Brown Tap Water Dangerous?
Brown water usually looks alarming, but it’s not always a health risk. In Australia, water safety is regulated by the Australian Drinking Water Guidelines, which set the standards for safe and clean drinking water. The most common cause is rust or sediment stirred up in the pipes, which can make the water look dirty but isn’t necessarily harmful. Still, drinking or cooking with discoloured water is not recommended until you know the cause. Many homeowners have concerns about the safety and quality of their tap water, but following the Australian Drinking Water Guidelines helps ensure that any risks are minimized. According to the Water Corporation, brown water is generally safe for bathing and cleaning, but it’s best to avoid using it for drinking or food preparation until it runs clear.
Common Causes of Brown Water in Australia
If you notice brown water coming from your taps, it can be alarming and may indicate several underlying issues. Water may turn brown for a variety of reasons, often related to your home’s plumbing or the local water supply. Here are the most frequent culprits in Australian homes:
Rust and Corrosion in Pipes
Older properties often have galvanised iron or steel pipes, which can rust over time. When water sits in these pipes or flows at high speed, rust particles can break free and mix with your tap water, giving it a brown or reddish tint.
Replacing rusted pipes with modern materials can help improve water quality.
Water Mains Disturbances
Work on water mains—like repairs, upgrades, or even a burst main—can disturb sediment that’s settled in the pipes. This sediment, often made up of harmless minerals and iron, can flow into your home, especially after the water has been turned off and back on. Disturbed sediment may be flushed out through your taps, sometimes causing temporary discoloration of the water.
Plumbing Works or Repairs
Recent plumbing work in your house or street can disturb pipes and loosen rust or sediment, leading to temporary brown water.
If brown water continues after plumbing work, a licensed plumber can provide advice on whether further action is needed.
Sediment Build-up
Sediment naturally builds up in water pipes over time. If water flow increases suddenly (for example, after a fire hydrant is used), this sediment can be pushed through to your taps.
Local Water Supply Issues
Heavy rain, drought, or changes at the water treatment plant can all affect water quality. Sometimes, these changes can lead to temporary discolouration. After heavy rain, organic matter such as decayed leaves or other biological material can enter the water supply and cause discoloration.
What to Do if You Notice Brown Water
Spotting brown water can be stressful, but there are some simple steps to follow:
- Run the cold taps and cold water for a few minutes. Use the tap closest to where the water enters your home (usually the front garden tap). This can help flush out any sediment or air bubbles.
- Check if it’s just one tap or the whole house. Test both the hot tap and hot water taps as well as the cold taps. If only one tap is affected, the issue is likely with your internal plumbing. If all taps have brown water, it’s probably a mains or supply issue.
- Avoid using hot water. Don’t run hot taps or use appliances like dishwashers or washing machines with brown water, as this can draw sediment into your hot water service and may require servicing.
- Fill an open container with water and let it stand for a few minutes. Observe if the water clears or if bubbles clear at the bottom. If the water becomes clear, it may just be aerated water, which is harmless. If sediment settles or the water remains discoloured, further action may be needed.
- Don’t drink or cook with the water. Wait until it runs clear.
- Observe the water coming from the tap. If the water coming out remains discoloured after these steps, seek help.
- Contact your local water provider if the problem doesn’t clear after a few minutes or if you notice a sudden, severe change in water colour.
If you’re in a rental property, let your landlord or property manager know straight away.
If you are concerned about your water quality or need further advice, contact a professional.
When to Call a Plumber
Some brown water problems can be traced to your home’s plumbing. Call a licensed plumber if:
- Only one or a few taps are affected
- The water is brown every morning or after long periods of not using the tap
- There’s a sudden drop in water pressure along with discolouration
- You see leaks or damp patches near pipes
A plumber can inspect your pipes for corrosion, leaks, or build-up and recommend repairs or replacements as needed.
When to Contact Your Water Provider
If all taps in your house show brown water, or if your neighbours have the same issue, the problem is likely with the water supply. Your water provider can give updates on any known issues or maintenance in your area. Most providers have a 24/7 faults line and online updates for water quality incidents.
Common Causes and What to Do
| Cause |
Signs |
What to Do |
| Rusty house pipes |
Only some taps affected, older home |
Call a plumber for inspection |
| Water mains disturbance |
All taps affected, neighbours have same issue |
Contact water provider, run tap |
| Recent plumbing work |
Issue started after repairs |
Flush taps, call plumber if ongoing |
| Sediment build-up |
Brown water after high water use nearby |
Run tap for several minutes |
| Local water supply changes |
After storms or drought, all taps affected |
Contact water provider |
How to Prevent Brown Water
Preventing brown water starts with regular maintenance and keeping an eye on your plumbing:
- Replace old galvanised or steel pipes with copper or plastic alternatives, which are less prone to rust.
- Book regular plumbing inspections to catch corrosion or leaks early.
- Install a whole-house water filter to catch sediment before it reaches your taps.
- Flush your taps regularly if you live in an area with older infrastructure.
Frequently Asked Questions
Is brown tap water safe to drink?
Usually, brown water is caused by iron or sediment and isn’t harmful, but it’s best to avoid drinking it until the water runs clear.
How long should I run the tap to clear brown water?
A few minutes is usually enough. If the water doesn’t clear after 10 minutes, contact your water provider.
Can brown water stain clothes or appliances?
Yes, iron and sediment can stain laundry and build up in appliances. Wait until the water is clear before using washing machines or dishwashers.
How common is brown water in Australia?
Incidents are relatively rare, but they do occur, especially after water mains work or in areas with older pipes. According to Sydney Water, less than 1% of customers report discoloured water each year.
Key Takeaways
- Brown tap water is usually caused by rust, sediment or disturbances in the water supply.
- It’s best to avoid drinking or cooking with brown water until it runs clear.
- Run your cold tap for a few minutes to flush out sediment.
- If only one tap is affected, call a plumber; if all taps are affected, contact your water provider.
- Regular maintenance and replacing old pipes can help prevent brown water.
- Brown water is rarely dangerous but can stain laundry and appliances.
If you’re unsure or the problem persists, don’t hesitate to reach out to our team or your local water provider for peace of mind. For more information on water quality and safety, visit the Australian Government’s Health Direct or your local water authority’s website.
by RSP Crew | May 1, 2025
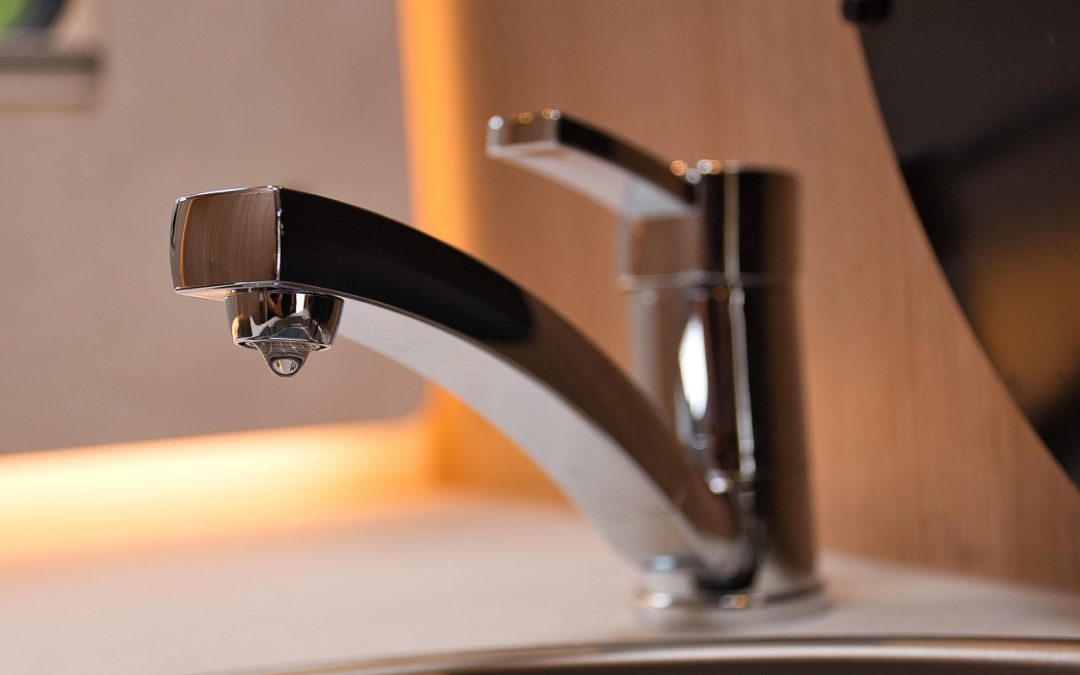
If you’re dealing with low hot water pressure at home, you’re not alone. Many Aussies face this problem, making everyday tasks like showering or washing dishes a hassle. Several things can cause low hot water pressure, like sediment in your system or corroded pipes.
Knowing why you have low hot water pressure is key to fixing it. In this article we’ll look at common causes and solutions. Knowing what’s going wrong helps you get back to hot water at home.
What’s Causing Low Hot Water Pressure
When you notice low hot water pressure, finding the cause is key. This saves you time and money on the wrong fixes. It also ensures you get the right solution.
Homeowners can often spot common causes by looking for symptoms and doing simple tests. These include:
- Sediment in the hot water tank
- A faulty or old hot water pressure regulator
- Partially closed or leaking water supply valves
- Corroded or clogged pipes restricting water flow
- Malfunctioning or incompatible shower heads and faucets
To figure out what’s causing your low hot water pressure try these steps:
| Symptom |
Potential Cause |
Diagnostic Check |
| Low hot water pressure throughout the house |
Sediment buildup, faulty pressure regulator, or partially closed main supply valve |
Check the water heater for sediment, test the pressure regulator, and ensure the main supply valve is fully open |
| Low hot water pressure in specific fixtures |
Clogged pipes, malfunctioning shower heads or faucets |
Check for visible corrosion or leaks, clean shower heads and faucet aerators |
| Fluctuating hot water pressure |
Leaking supply valves or corroded pipes |
Inspect supply valves and exposed pipes for leaks or corrosion |
Many homeowners can fix some hot water pressure problems themselves. But if you’re not sure or unsure it’s best to call Rapid Service Plumbing. A licensed plumber can find the real problem and recommend the best fix to get your hot water flowing again.
Sediment in Hot Water Systems
Low hot water pressure often comes from sediment in the tank. Minerals like calcium and magnesium build up and block water flow and pressure.
In areas with hard water sediment builds up faster. When heated these minerals settle at the bottom of the tank. If not cleaned this can damage water pressure. Sediment builds up slowly but surely. As water heats up minerals separate and settle. Over time this layer grows and takes up space and reduces water storage.
Signs of Sediment Buildup Affecting Water Pressure
Look out for these signs of sediment buildup:
- Reduced water flow from hot water taps and showers
- Longer wait times for hot water to reach fixtures
- Rumbling or popping noises coming from the hot water tank
- Inconsistent water temperature or sudden temperature changes
Flushing the Hot Water Tank to Remove Sediment
To fix low pressure, flush your tank regularly. Here’s how:
- Turn off the power or gas to your hot water tank.
- Attach a garden hose to the drain valve at the bottom of the tank.
- Run the other end of the hose to a drain or outside, away from your home.
- Open the drain valve and let the tank empty, flushing out sediment.
- Close the drain valve and refill the tank with fresh water.
- Restore power or gas to the tank and let it reheat the water.
Flushing your tank removes sediment and keeps water pressure high. Regular maintenance prevents buildup and keeps your system working well.
Faulty or Old Hot Water Pressure Regulator
A hot water pressure regulator is key to keeping water pressure steady in your home. Over time these regulators can fail or wear out and cause pressure to drop. If you’ve seen a sudden pressure drop it’s time to check your regulator.
To see if the regulator is the problem, do a simple test. Find the regulator near the main water line. Look at the pressure gauge. If it’s not between 50-60 psi it’s off and needs adjusting or replacing.
Adjusting a hot water pressure regulator is easy. Most have an adjustment screw. Turn it clockwise to increase pressure or counterclockwise to decrease. Make small changes and check the gauge until it’s right.
If adjusting doesn’t fix it you might need a new regulator. They usually last 7-12 years. If yours is getting old it’s time for a new one to get your pressure back up.
Partially Closed or Leaking Water Supply Valves
When you have low hot water pressure, check your water supply valves. If these valves are not fully open or leaking, it will reduce hot water flow. This means lower pressure at your taps and showers.
Where is the Main Water Supply Valve
Find your home’s main water shutoff valve first. This valve controls water flow to your whole plumbing system. In many Australian homes you can find it in these spots:
- Near the water meter, often in a box or pit near the street
- In the basement or crawl space, where the water line enters the home
- Near the hot water system or tank
Check for Partially Closed Valves
After finding the main valve, make sure it’s fully open. A valve that’s not fully open will limit water flow and cause low hot water pressure. Also check other water supply valves near your hot water system and around your home. Make sure they are fully open too.
Leaks in Water Supply Valves
Leaks in water supply valves can also cause low hot water pressure. Look for:
- Visible water droplets or puddles near the valve
- Corrosion or mineral buildup around the valve stem
- Hissing or dripping sounds coming from the valve
If you see leaking valves, get them fixed or replaced by a licensed plumber. This will restore hot water pressure and prevent water damage to your home.
Corroded or Clogged Pipes Restricting Water Flow
Low hot water pressure might be due to corroded or clogged pipes. These issues can slow down water flow and cause pressure problems. Let’s see how these problems occur and what you can do to fix them.
Signs of Corroded Pipes Affecting Water Pressure
Pipe corrosion happens slowly and can affect your hot water pressure. Look out for:
- Discolored water with a reddish or brownish tint
- Visible rust on exposed pipes* Metallic taste or smell in the water
- Frequent leaks or ruptures in the plumbing system
If you see any of these signs, act fast. Corroded pipes not only lower water pressure but can also make your water unsafe. They can contain harmful substances like lead and copper.
Clogs in Pipes Reduce Hot Water Pressure
Clogged pipes are another reason for low hot water pressure. Over time, things like mineral buildup and debris can block the pipes. This restricts water flow. Factors that can cause blockages include:
Causes
- Hard water
- Water with high mineral content can leave deposits in pipes
- Corrosion
- Corroded pipes can flake off and create blockages
- Foreign objects
- Small items like hair, soap, or debris can get stuck in pipes
Try a plumber’s snake or a chemical drain cleaner to fix clogged pipes. But if the problem is serious, call a plumber. They can safely and effectively clear the blockage.
By watching for signs of corrosion and blockages, you can catch problems early. This way, you can keep your hot water pressure at its best.
Faulty or Incompatible Shower Heads and Faucets
When you have low hot water pressure, think about your shower heads and faucets. Sometimes the problem is with these fixtures. Low-flow shower heads and water-saving faucets can cut down the water flow too much, making showers less enjoyable.
Check your shower head for wear, damage or mineral buildup. A clogged or corroded shower head can really lower water pressure. Try cleaning it with a mix of white vinegar and water. Let it soak for a few hours before rinsing well.
Sometimes you might need a new shower head. Choose one that fits your home’s water pressure and plumbing. Look for a shower head with adjustable settings to control flow without losing pressure. Remember, while low-flow shower heads save water, they might not be best if your home already has low water pressure.
Water-saving faucets in sinks and tubs can also lower hot water pressure. If you’ve put in new faucets and noticed lower pressure, check if they match your plumbing system. Sometimes swapping out fixtures for ones that fit your home’s water pressure needs can help a lot.Replacing malfunctioning or incompatible shower heads and faucets can boost hot water pressure. But if replacing them doesn’t fix the problem, look for other causes. These could be sediment buildup, faulty pressure regulators or leaks in your plumbing system.
Troubleshooting low hot water pressure Issues
Low hot water pressure can be really frustrating. But there are steps you can take to fix it yourself. Before you call a plumber, try these DIY fixes to boost your hot water pressure.
DIY Methods for Increasing Hot Water Pressure
First, clean your shower heads and faucet aerators. Mineral buildup can slow down water flow. Soak the shower head or aerator in white vinegar and water for hours. Then, use an old toothbrush to scrub off any dirt before putting it back on.
Next, look for leaks in your plumbing. Even small leaks can lower water pressure a lot. Check pipes, valves and connections for moisture or drips. If you spot a leak, tighten the connection or replace damaged parts.
If your home has a pressure regulator, you might be able to adjust it. Find the regulator near the main water valve. Turn the adjustment screw a bit clockwise to increase pressure. But be careful not to overdo it, as it could harm your plumbing.
When to Call Rapid Service Plumbing for Low Water Pressure
If these DIY fixes don’t work, it’s time to call a plumber. Problems like corroded pipes or a faulty water heater need a pro’s touch.
Also, if you’re not sure how to fix the issue or it’s a complex problem, Contact us. We can find the real cause and fix it properly, getting your hot water back to normal.
Maintaining Optimal Hot Water Pressure in Your Home
To keep your hot water flowing well, regular maintenance is key. It helps prevent low water pressure issues. This way, you won’t face weak water flow when you need it most.
Check your pipes often for leaks or corrosion. A small leak can lower water pressure over time. Also, clean your hot water tank yearly to stop sediment buildup. This can block water flow and cause pressure issues.
If you notice your water pressure dropping, act fast. A weak shower spray or slow sinks are signs of a problem. Fixing it early can save you from bigger issues and expensive repairs later.
FAQ
What are the most common causes of low hot water pressure?
Low hot water pressure can be caused by many things. Sediment in the tank, faulty pressure regulator, and closed valves are common offenders. Corroded or clogged pipes and bad shower heads also play a role.
How do I know if sediment buildup is affecting my hot water pressure?
Sediment buildup shows up as a drop in pressure over time. You may also see discolored water or hear strange noises from the tank.
What if I suspect a faulty hot water pressure regulator?
First, check the regulator for damage or leaks. Try adjusting it to see if that helps. If not, a plumber should take a look.
Can partially closed water supply valves cause low hot water pressure?
Yes, closed valves can reduce water flow. Make sure all valves are fully open. Fix any leaks to avoid more problems.
How do I know if corroded pipes are affecting my hot water pressure?
Corroded pipes show up as discolored water and visible rust. A drop in pressure is another sign. A plumber can assess and fix the damage.
Can installing water-saving shower heads and faucets cause low hot water pressure?
Some water-saving fixtures may limit flow too much. Choose ones that still allow good pressure. If pressure drops after installing new fixtures, consider changing them.
What are some DIY methods for increasing hot water pressure?
Clean shower heads and aerators to remove buildup. Fix leaks and flush the tank to clear sediment. Adjust the regulator if you can. But if these don’t work, a plumber is needed.
How often should I flush my hot water tank to maintain optimal pressure?
Flush your tank at least once a year to keep pressure up. More often if you have hard water or see sediment. Check your tank’s manual or ask a plumber for advice.
Key Takeaways
- Low hot water pressure can be caused by sediment buildup, faulty regulators, partially closed valves, corroded pipes, or incompatible fixtures
- Regular maintenance, like flushing your hot water tank, can prevent low hot water pressure issues
- Finding leaks, clogs, and corrosion in your plumbing system is key to maintaining optimal water pressure
- Upgrading to water-efficient shower heads and faucets can improve hot water pressure while saving water – if not call us now!
by RSP Crew | Mar 5, 2025
Ever found yourself with a clogged toilet and no plunger? You’re not alone. Many Aussies face this problem, looking for ways to fix it without a plunger.
But there’s good news. You can unclog a toilet with items you likely have at home. We’ll show you how to deal with a stubborn blockage. No more panic, just practical fixes!
What Causes a Clogged Toilet?
Before you try to unclog a toilet without a plunger, you need to know why it’s clogged. Knowing the cause helps you pick the best way to fix a badly clogged toilet. This way you can drain the toilet without a plunger properly.
Using too much toilet paper is a common cause of clogs. Even though toilet paper is meant to dissolve, too much can get stuck. Try to use less paper and flush in smaller amounts if you need to.
Foreign objects like toys or phones can also block your toilet. These items can get stuck in the drain, stopping water from flowing. To prevent this, keep the toilet lid closed and teach your family what can be flushed.
A badly clogged toilet can lead to overflow and mess, making it crucial to take preventative measures. Regular maintenance and mindful flushing habits can help avoid severe clogs.
Sometimes a faulty flush system might be the problem. Issues with the flapper or fill valve can stop the toilet from flushing right. If you think this is the case, it’s best to call a plumber to fix it.
Knowing why your toilet is clogged is the first step to unclogging it without a plunger. By knowing the cause you can choose the right method to fix it. This will get your toilet working again.
Tools and Materials Needed
Before you start to unclog your toilet without a plunger, you need the right tools and materials. These will help you do the job well and keep you safe from any mess. Let’s take a look at what you’ll need.
Rubber Gloves and Old Towels
First get a pair of rubber gloves. They will protect your hands from harmful bacteria or debris. Also have some old towels ready to clean up any spills or drips.
Bucket and Disposable Cups
You’ll need a bucket and disposable cups to unclog the toilet. Use them to move water from the sink or bathtub to the toilet bowl. This will help break up the blockage. Make sure the bucket is clean and the cups can handle hot water.
Drain Snake or Coat Hanger
For unclogging, a drain snake or a straightened coat hanger is very helpful. These will allow you to reach deep into the drain and remove the blockage. Be careful not to damage the toilet or the drain pipe.
Having these tools and materials ready, including a wire coat hanger, will help you tackle the clog properly. Remember, preparation is key when unclogging a toilet without a plunger.
The Hot Water Method
Wondering how to unclog a toilet without a plunger? The hot water trick is simple and works. Pour hot water into the toilet bowl to break up and dissolve the blockage.
Boiling Water Carefully
First boil water on the stove. While waiting remove some water from the toilet if it’s full. Once boiling carry the pot to the bathroom carefully.
Pouring Technique and Precautions
Stand back from the toilet and slowly pour the boiling water into the bowl. Aim for the drain hole and keep the stream steady. Be careful not to splash the hot water, it can burn you.
Wait a few minutes to see if the water level drops. This means the blockage is clearing. If the water drains slowly you may need to repeat the process a couple of times.
Remember this method is effective but requires caution. Use oven mitts or gloves to protect your hands. Don’t splash the water on yourself or surfaces that could get damaged by heat.

DIY Plunger Alternative
Don’t worry if you don’t have a plunger. There are easy DIY fixes to unclog your toilet. You can make a plunger from things you have at home.
First use a plastic bottle with a narrow neck, like a water or soft drink bottle. Take off the cap and drain any liquid. Then wear rubber gloves and fill the bottle with warm water. Put your thumb over the top and push the water into the bowl, aiming at the drain.
The water pressure should push out the blockage, like a plunger. If it doesn’t work the first time try again a few times. Make sure to fill the bottle with more warm water each time.
You can also use a toilet brush as a plunger. Just push the brush into the drain and move it up and down hard. The bristles will help break up the blockage. Remember to wear gloves and clean the brush well after.These DIY fixes might not work for tough clogs. If they don’t help you’ll need to try other ways to unclog your toilet without a plunger.
Baking Soda and Vinegar Method
Wondering how to unclog a toilet without a plunger? Try using baking soda and vinegar. It’s a simple way to clear the clog and get your toilet working again.
Alternatively, you can use Epsom salt, which is effective due to its chemical properties that help break down stubborn debris.
Mixing the Ingredients
Start by pouring a cup of baking soda into the toilet bowl. Then add a cup of white vinegar slowly. Be careful as the mixture will fizz and bubble.
Waiting for the Reaction
After adding both let the mixture sit for about 20 minutes. The baking soda and vinegar will break down the clog making it flushable.
“The combination of baking soda and vinegar is a tried-and-true method for unclogging toilets without a plunger. The chemical reaction helps to dissolve the blockage making it easier to flush away.”
Flushing and Repeating if Necessary
After 20 minutes flush the toilet to see if it’s clear. If it’s still slow or clogged repeat the process. Add more baking soda and vinegar wait 20 minutes and flush again.
This method is a simple and effective way to unclog a toilet without a plunger. Keep baking soda and vinegar on hand for quick fixes.
Drain Snake or Wire Hanger
When your toilet drain gets clogged and you don’t have a plunger, a drain snake or a wire hanger can help. These tools will let you remove the blockage manually. This way your toilet will work like new again. Here’s how to do it.
Start by preparing your drain snake or a straightened wire hanger. Make sure it’s smooth and won’t scratch the toilet. Carefully push the tool into the toilet bowl, go as far down as you can.
Don’t push too hard as it might harm the toilet’s inside. Once it’s in, wiggle and rotate the tool to break up the clog. You’ll feel resistance when you hit the blockage. Keep working it until the clog is dislodged.
As you work, you’ll see the water level in the bowl drop. This means you’re making progress. After a few minutes, remove the tool from the toilet. If you’ve broken up the clog, the debris should come out with it. Throw away any debris and clean the tool for next time. Then flush the toilet to see if the clog is gone. If the water flows well, you’ve done it! If not, try again or look at other methods in this guide.
How to Unclog a Toilet Without a Plunger Using Dish Soap
Don’t worry if you don’t have a plunger for a clogged toilet. You can use dish soap to fix it. Dish soap makes the blockage slide through the drain easily.
Squirt Dish Soap into the Bowl
To unclog your toilet without a plunger follow these steps:
- Grab a bottle of liquid dish soap from your kitchen.
- Squirt about half a cup of dish soap into the toilet bowl.
- Make sure to squirt it towards the drain hole.
Let the Soap Do Its Job
Now let the dish soap do its job. It will slowly seep into the blockage. For best results:
- Let the dish soap sit in the toilet bowl for 15-20 minutes.
- Don’t flush the toilet during this time to avoid overflow.
- If the clog is tough you might need to repeat the process or wait longer.
After the dish soap has worked test if the clog is gone. Flush the toilet and see if the water drains well. If not you might need to try again or use another method.
Method Time Required Success Rate Dish Soap 15-20 minutes 70-80% Hot Water 10-15 minutes 60-70% Baking Soda & Vinegar 30-60 minutes 50-60%
By using dish soap you can unclog your toilet without a plunger. It’s a handy trick when you’re in a tight spot and can’t find a plunger.
Preventing Future Clogs
Now you know how to unclog a toilet without a plunger. It’s key to prevent future clogs. Simple habits and regular maintenance can keep your toilet flowing well. This way you avoid the trouble of a blocked toilet.
Proper Toilet Paper Usage
Excessive or improper toilet paper use often causes clogs. Be careful with how much you use and avoid flushing big wads. Here are some tips for using toilet paper right:
- Use only as much toilet paper as necessary
- Fold the toilet paper instead of wadding it up
- Flush in stages if you need to use a lot of toilet paper* Consider using septic-safe or biodegradable toilet paper if you have a septic system
Don’t Flush Inappropriate Items
Flushing items that shouldn’t be flushed is another big cause of clogs. Many “flushable” products can still cause problems. Avoid clogs by not flushing these items:
Item Reason Wet wipes, baby wipes, makeup wipes Don’t break down like toilet paper Feminine hygiene products Expand with moisture and cause clogs Cotton balls, swabs, pads Don’t dissolve and accumulate in pipes Dental floss Can tangle and create net that traps debris Paper towels, tissues Too thick and not designed to break down
Regular Maintenance and Cleaning
Being mindful of what you flush is important to prevent toilet clogs. Regular toilet maintenance also helps prevent clogs. Here are some simple tips:
- Clean your toilet regularly with a brush and cleaner
- Flush the toilet after each use to prevent buildup
- Check for leaks or running water and repair promptly
- Schedule professional inspections annually
By following these tips you can reduce the chance of a clogged toilet greatly. If you need to unclog your toilet without a plunger, the methods in this guide will help you unblock even a badly blocked toilet fast.
When to Call a Professional Plumber
Knowing how to unclog a toilet without a plunger when the water is high is useful. But, there are times when you should call an emergency plumber for a severe toilet clog. If you’ve tried many ways to unblock a badly blocked toilet without a plunger and it still won’t budge, it might be a bigger problem.
Deeper blockages in the main sewer line need special tools and skills. Also, if water backs up in other drains or toilets, it’s a sign of a bigger issue.
Trying to unclog a toilet without a plunger when the water is high can be risky. If you’re not sure what to do you might damage your toilet or plumbing system.
It’s safer to call a licensed plumber in these situations. They can fix the problem without causing more damage. While it might cost more it can save you from bigger expenses later and keep your plumbing working well.
Unclog a toilet without a plunger might seem hard but it’s possible with the right tools and methods. You can try using hot water and dish soap or make a DIY plunger from a plastic bottle. Remember it might take a few tries to clear the blockage.
To avoid clogs in the future be mindful of what you flush. Only use the right amount of toilet paper and don’t flush items like wipes or cotton balls. Regular cleaning and hot water in the pipes can also help prevent clogs.
By following this guide you can avoid calling a plumber for simple clogs. But if you can’t clear the blockage it’s okay to ask for professional help. This will keep your plumbing in top shape.
Conclusion
- You can unclog a blocked toilet without a plunger using common household items
- Hot water, dish soap and a DIY plunger alternative can clear minor clogs
- Baking soda and vinegar create a fizzy reaction that can break up blockages
- A drain snake or wire hanger can be used to manually remove obstructions
- Prevention is key – avoid flushing inappropriate items and use toilet paper responsibly
FAQ
How can I unclog a toilet without a plunger?
You can unclog a toilet without a plunger in several ways. Try pouring hot water or use a DIY plunger alternative. Baking soda and vinegar can also help as can a drain snake or wire hanger. These methods use common household items to clear the blockage.
What causes a toilet to become clogged?
Toilets can clog from too much toilet paper or flushing the wrong things. Items like wipes or sanitary products can cause problems. A faulty flush system can also lead to clogs. Knowing why it clogged helps you choose the right fix.
Is it safe to pour boiling water into a toilet bowl?
Pouring hot water can unclog a toilet but be careful. Pour slowly to avoid splashing. Check your toilet’s material first as extreme heat can damage some.
Can I use a wire hanger to unclog my toilet?
Yes, a wire hanger can be a drain snake. Straighten it and make a hook. Insert the hook into the drain and gently move it to break up the clog. Be gentle to avoid damaging the toilet or drain.
How does dish soap help in unclogging a toilet?
Dish soap can lubricate a clog and make it easier to flush. Squirt a lot of soap in the bowl and let it sit for a few minutes. Then try flushing again.
What if I can’t unclog my toilet with these methods?
If these don’t work or you think the clog is serious call a plumber. Plumbers have the tools and knowledge to fix tough clogs and prevent damage.
How do I prevent future clogs?
To avoid clogs use less toilet paper and don’t flush the wrong things. Clean your toilet regularly and check the flush system for problems. This will keep your toilet in great shape.
by RSP Crew | Feb 13, 2025
There’s nothing more frustrating than a toilet that won’t flush properly. A toilet won’t flush is a common issue that many people face. Whether it’s a slow drain, weak flush or water that just won’t go down at all, toilet troubles are the last thing you want to deal with. But ignoring the problem will only make it worse. A faulty toilet wastes water, causes major inconvenience and could even lead to costly damage if left unchecked.
The good news is many common toilet problems have simple fixes you can do yourself with a few basic tools and some know how. In this article we’ll look at the usual suspects behind a poorly flushing toilet and share some DIY solutions. We’ll also look at when to call in a pro plumber. Let’s get that toilet working again!
Common Causes of Why Your Toilet Won’t Flush
So what’s causing your commode conundrum? Here are the most common culprits:
- Clogged Toilet or Pipes When there’s a blockage water can’t get out of the bowl. This could be from too much toilet paper, flushing non-flushable items like wipes or tissues or mineral build up in the pipes over time. Signs of a clog are water rising very high in the bowl or draining very slowly when flushed.
- Low Water Level in the CisternIf there’s not enough water in the tank you’ll get a weak or incomplete flush. This is often due to a faulty float mechanism that controls the fill level or a problem with the water supply. Understanding the components of the toilet cistern can help in diagnosing these issues.
- Faulty Flapper or Flush Mechanism The flapper is the rubber seal that opens to let water rush into the bowl when you flush. If it’s worn out, has a slack chain or the flush button itself is broken flushing will be slow or water will run constantly. Maintaining the flushing mechanism is crucial for proper toilet functionality.
- Blocked Rim Jets Those little holes under the rim of the toilet bowl are called rim jets. Their job is to release water and clean the bowl sides when you flush. Mineral deposits from hard water can clog them up reducing flow power. Clogged inlet holes can also be a potential issue.
- Water Pressure IssuesLow water pressure from your home plumbing system or the municipal supply can result in a weak flush. It takes a certain amount of pressure to clear the bowl properly. Reduced water flow can significantly impact the flushing power of your toilet.
Water-Related Issues Affecting Toilet Flush
Water-related issues can significantly impact the performance of your toilet flush. One common problem is a low water level in the toilet tank. If the water level is too low, the toilet may not flush properly, leading to a weak or incomplete flush. To resolve this issue, check the water supply to the toilet and ensure that the fill valve is functioning correctly. You can also adjust the float arm to raise the water level in the tank.
Another water-related issue that can affect toilet flush is a clogged overflow pipe. The overflow pipe is designed to prevent water from overflowing into the toilet bowl. However, if the pipe becomes clogged, it can prevent the toilet from flushing properly. To clear a clogged overflow pipe, use a toilet auger or a plumbing snake to remove any blockages.
DIY Fixes
If your toilet won’t flush, there are several DIY fixes you can try before calling a professional plumber. One common issue is a clogged toilet bowl. To clear a clogged toilet bowl, use a plunger or a toilet auger to remove any blockages. You can also try using a plumbing snake to clear any clogs in the drain lines.
Another DIY fix is to adjust the flapper chain. If the flapper chain is too long, it can prevent the flapper from opening fully, leading to a weak flush. To adjust the flapper chain, simply shorten the chain to the recommended length.
Preventative Maintenance for a Healthy Toilet Bowl
Preventative maintenance is key to keeping your toilet bowl healthy and functioning properly. One important task is to clean the toilet bowl regularly. Use a toilet brush to scrub the bowl and remove any mineral deposits or stains. You can also use a toilet cleaning product to help remove tough stains.
Another important task is to check the toilet tank regularly. Ensure that the water level is at the recommended height and that the fill valve is functioning correctly. You can also check the flapper and flush valve for any signs of wear or damage.
DIY Fixes: Ready to be your own toilet troubleshooting hero? Try these with toilet paper:
- For a clogged toilet your best friend is a plunger. Not all issues are due to a broken toilet; sometimes it’s just a matter of troubleshooting the flush mechanism. Make sure you have a good seal around the bowl drain hole. Plunge up and down, maintaining the seal. If it’s a tough clog add some hot (not boiling) water to the bowl first. Avoid flushing non-degradable materials like wet wipes to prevent serious blockages.
- Still clogged after plunging? Time to bring out the big guns: a toilet auger (aka plumber’s snake). Feed the coiled wire end into the drain hole and crank the handle to push it through the pipe until you feel the blockage. Crank and push to break it up then flush. Repeat if needed.
- Check the water level in the cistern. There’s usually a mark indicating the fill line about 1/2 inch below the top of the overflow tube. Adjust the float mechanism so it stops at this level. Make sure the refill tube isn’t inserted too far into the overflow tube which can siphon water out. Lift the tank lid to inspect components like the float and water level.
- To clean gunky rim jets pour a few cups of white vinegar into the overflow tube in the tank and let it sit for a few hours to dissolve mineral deposits. Give the holes a gentle scrub with an old toothbrush then flush. For stubborn build-up use a specialised acid-based cleaner.
- Replacing a faulty flapper is easier than you think. Turn off the water supply to the toilet, flush to empty the tank, then simply unhook the old flapper and install the new one, attaching the chain. Turn the water back on and test it out. (Make sure to get a flapper that fits your specific toilet model.)
When to Call the Plumber
Sometimes toilet troubles are beyond a simple DIY. Persistent issues with toilet flushes, such as ineffective flushing or problems with the flush mechanism, often require a professional assessment. Here’s when to call in Rapid Service Plumbing:
- If you’ve tried plunging and snaking thoroughly but the clog just won’t quit there could be a more serious blockage deep in the sewer line that requires special plumbing equipment to clear.
- Repairs to the inner workings of the cistern like the flush valve or fill valve are often best left to a plumber to avoid water damage or ending up with a non-functional toilet.
- If multiple drains in your home are backing up or you have ongoing or repeated problems with your toilet it’s time for a plumber to assess your plumbing system and fix any underlying issues.
Flush Away Water Waste: Did you know older toilets use 9-11 liters of water per flush? Modern dual-flush toilets use 3-6 liters and flush properly.
Upgrading to a water-wise dual flush system could cut your toilet water usage in half – a win for the planet and your wallet. Plus less water down the drain means your septic system (if you have one) will work better and last longer.
Regular toilet maintenance is key to avoiding water waste due to leaks or poor flushing. Keep your toilet in good shape and it will reward you with low-water flushes for years to come.
Happy Toilet Tips
- A healthy toilet means a happy home – don’t ignore problems, fix them early
- Most toilet problems have DIY solutions using basic tools and techniques
- Know when you’re in over your head – some repairs require a plumber
- Upgrade to a dual-flush toilet to dramatically reduce water per flush
- Maintenance goes a long way in preventing future flushing woes
Now you’re armed with the tools to tackle toilet troubles and keep things flowing in the loo. Happy flushing!
by RSP Crew | Feb 4, 2025
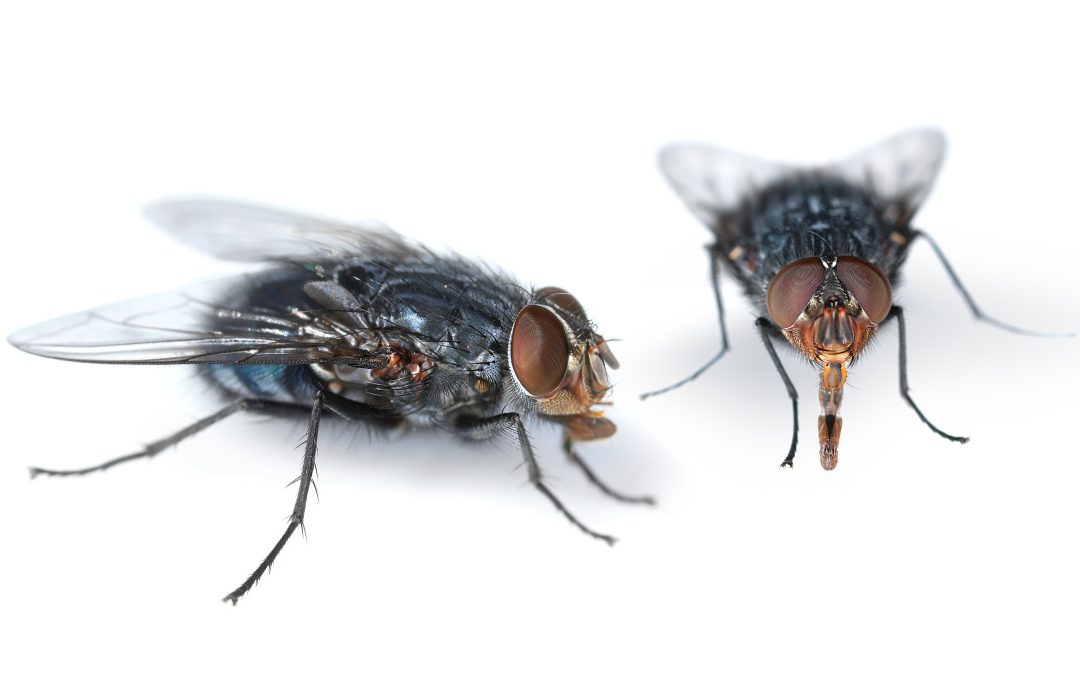
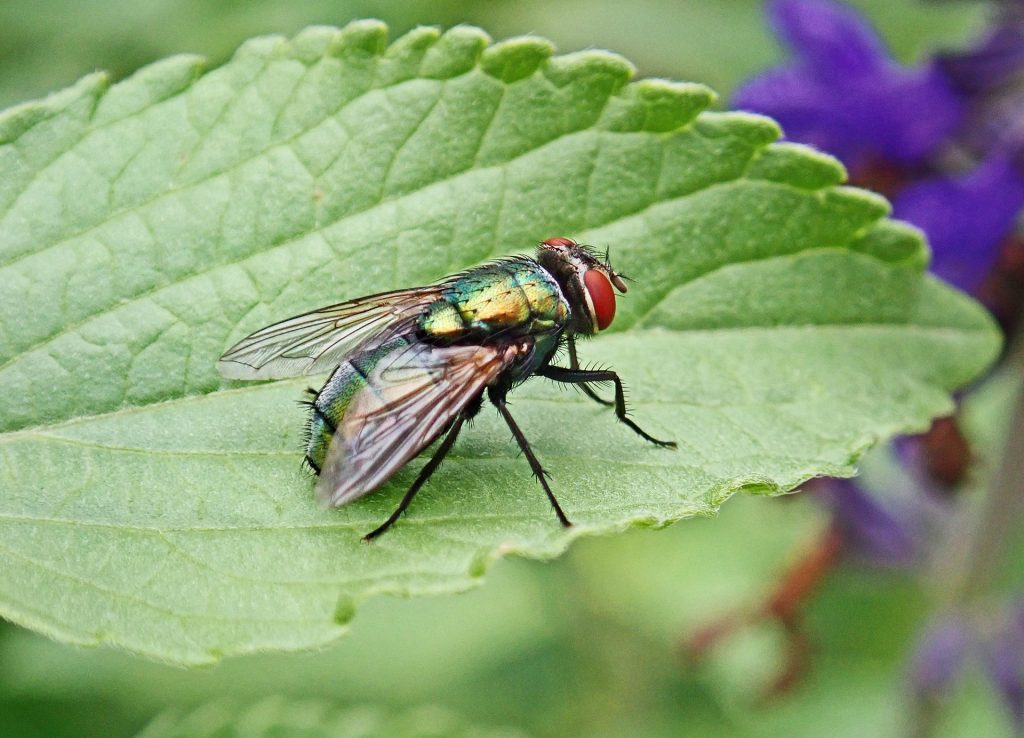
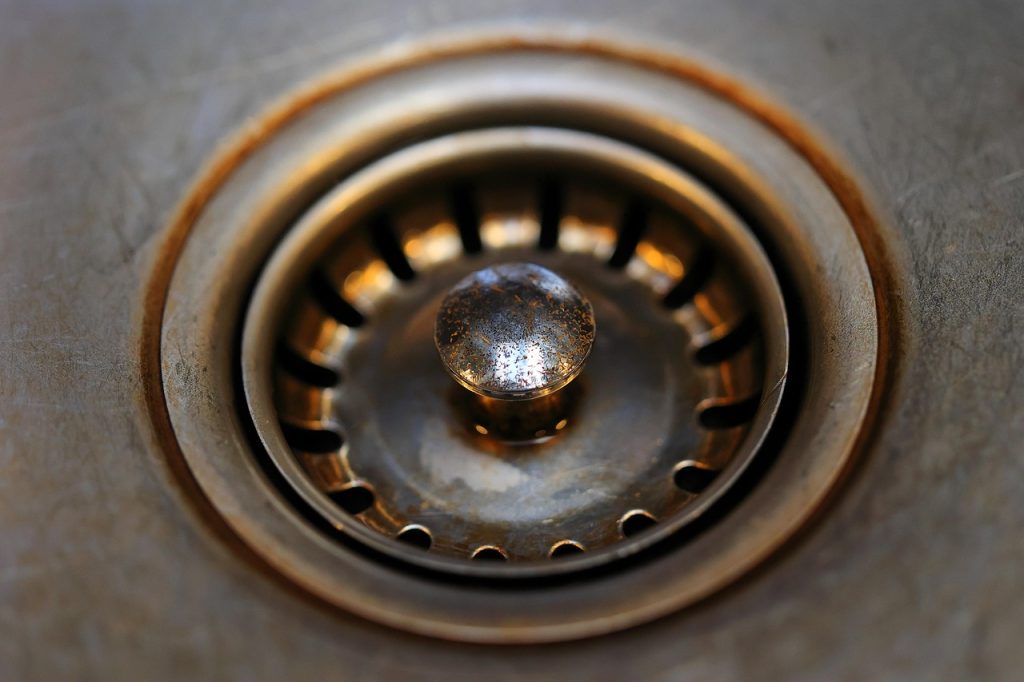
If you’ve noticed small, moth-like insects around your sinks or drains, you likely have drain flies. This article will show you how to identify and eliminate drain flies in Australia. Specifically, we will focus on drain flies Australia and provide effective solutions for getting rid of them.
Identifying Drain Flies in Australia
Drain flies, also known as filter flies, moth flies, sewer flies, and sewer gnats, are often seen fluttering around sinks and bathtubs, resembling tiny moths with their distinctive appearance. These insects have tiny, hairy wings and antennae, typically ranging in color from grey to black, and measure about 1.5-5mm in size. Their moth-like appearance makes them easy to identify compared to other small flies like fruit flies and sink flies.
These pests thrive in moist areas such as drains, septic tanks, and places with standing water where they find ample organic material to breed. They are not just limited to bathroom drains but can also be found in kitchen sinks, floor drains, and other moist environments around the house, which serve as a breeding ground for them.
Identifying their typical habitats and recognising their appearance are essential in managing a drain fly infestation.
The Life Cycle of Drain Flies

Grasping the life cycle of drain flies aids in their effective elimination. Drain flies undergo a complete metamorphosis involving four stages: egg, larva, pupa, and adult. Female drain flies can lay between 30 to 200 eggs at a time, usually in moist areas rich in organic material such as the inner surfaces of drains or septic tanks. These eggs hatch in about 7 to 28 days, depending on environmental conditions.
The larval stage, which lasts between 9 to 15 days at optimal temperatures, is when the drain fly larvae feed on organic matter, aiding their growth. Once mature, the larvae transition into the pupal stage, characterised by their yellow to brown color and small respiratory structures resembling horns.
The entire life cycle of drain flies typically spans between 21 to 27 days. This rapid development means that a small infestation can quickly become a larger problem if not addressed promptly. Recognising each stage of their life cycle allows for targeted treatment methods to effectively eliminate them.
Are Drain Flies Harmful?
While drain flies are generally harmless, their presence can be a nuisance and may indicate underlying plumbing or sanitation issues that need attention. Some individuals may experience allergic reactions to the fine hairs of these flies, which can cause skin irritation or respiratory issues. However, it’s important to note that drain flies do not bite and are not known to transmit diseases.
The real concern with drain flies is the potential plumbing problems they signify. Their breeding grounds in moist, organic-rich environments like drains and septic tanks suggest that there may be clogs or leaks that need fixing. Addressing these drain fly issues not only helps eliminate the current infestation but also prevents future drain fly problem from arising.
Common Causes of Drain Fly Infestations
Drain flies thrive in environments with standing water and organic matter, which serve as ideal breeding grounds. Clogged drains or sewer lines create stagnant water, attracting these pests. Unused toilets and leaking pipes can also become breeding grounds for drain flies due to the accumulation of standing water.
These insects are commonly spotted in areas with accumulated organic matter, such as food scraps, oils, fats, and other debris in kitchen sinks. The moist environments rich in organic materials provide ample food for drain fly larvae to thrive. The presence of drain flies can signal unsanitary plumbing conditions that need addressing to prevent the infestation from worsening.
Regular cleaning of pipes and sinks is an effective method for keeping drain flies away. Keeping drains clear of organic buildup and promptly fixing leaks can significantly reduce the chances of attracting drain flies. Maintaining cleanliness and proper sanitation is key to preventing a drain fly infestation.
Steps to Get Rid of Drain Flies
Eliminating drain flies involves a series of steps aimed at targeting their breeding grounds and preventing future infestations. These methods range from locating the source of the infestation to using natural remedies like vinegar and baking soda, as well as chemical cleaners and tools to kill drain flies.
Adhering to these steps can effectively rid your home of drain flies and prevent their return.
Locate the Source of the Infestation
The first step in eliminating drain flies is to locate their breeding grounds. Check for stagnant water in drains, rotting fruit, animal waste, and any decaying organic material. Drains, pipes, and other moist areas are potential breeding sites for drain flies. Pinpointing these areas allows for more targeted efforts.
Regularly cleaning and flushing drains can help prevent the entry of drain flies. By keeping these areas clean and free from organic buildup, you can significantly reduce the chances of a drain fly infestation. Addressing all potential breeding grounds is vital for eliminating these pests.
Pour Boiling Water Down Drains
Boiling hot water poured down the drain can effectively eliminate drain fly larvae. This method kills the larvae, preventing them from maturing into adult flies. For best results, pour boiling water down the drain 1-2 times a day for about a week.
Simple and cost-effective, this method is an excellent first step in tackling a drain fly infestation. Consistently using boiling water over several days ensures any remaining larvae are eradicated, preventing recurrence.
Natural Remedies: Vinegar and Baking Soda
Vinegar and baking soda prove highly effective in combating drain flies. Mixing baking soda with white vinegar creates a reaction that helps break down organic matter and attract drain flies. Pouring this mixture down the drain can help eliminate drain flies and their larvae.
Another effective trap involves mixing sugar, water, vinegar, and a few drops of dish soap. This mixture attracts drain flies, and the soap makes it difficult for them to escape.
Safe, inexpensive, and effective, these natural remedies tackle a drain fly infestation without harsh chemicals.
Chemical Cleaners and Tools
Persistent infestations might require chemical cleaners and tools. Products like Drano and Bio-Clean are commonly used to eliminate drain flies by removing the organic buildup that attracts them. Physical scrubbing with pipe brushes can also help remove stubborn organic matter.
Follow instructions closely when using chemical cleaners to ensure safe usage. Combining chemical cleaners with natural remedies like baking soda and vinegar enhances the cleaning effort against drain flies.
Together, these methods offer a comprehensive approach to eliminating drain flies and their breeding grounds.
Preventing Future Drain Fly Infestations
Preventing future drain fly infestations involves maintaining cleanliness and addressing potential breeding grounds. Regular cleaning of drains removes organic materials that serve as breeding grounds for drain flies. Professional drain cleaning services can also help prevent the re-emergence of infestations.
Promptly repairing leaks and using all household drains regularly helps maintain dry environments, less conducive to drain fly breeding. Additionally, keeping outdoor compost piles contained and dry reduces the likelihood of attracting drain flies.
These preventive measures can significantly reduce the chances to prevent drain flies and a drain fly infestation.
Professional Help for Persistent Infestations
If DIY methods fail to eliminate the infestation effectively after 20 days, it’s time to call a professional plumber. Professional plumbers can pinpoint plumbing issues and apply commercial-grade treatments to eliminate drain flies effectively. They have the expertise and tools to tackle even the most stubborn infestations.
Rapid Service Plumbing, a trusted provider in Sydney, offers expert plumbing services to handle persistent drain fly problems and issues related to drain pipes. Their expertise ensures the root causes of the infestation are addressed, providing a long-term solution.
Key Takeaways
- Drain flies thrive in moist environments with organic matter, often indicating plumbing issues that require attention.
- An understanding of the drain fly life cycle helps to implement targeted elimination strategies effectively.
- Preventing future infestations involves regular cleaning of drains, addressing potential breeding grounds, and seeking professional help if DIY methods are unsuccessful.
Frequently Asked Questions
How do I permanently get rid of drain flies?
To permanently eliminate drain flies, regularly pour half a cup of baking soda followed by half a cup of white vinegar down the sink. Then, flush it with boiling water after a few minutes. Repeat this process every few days until the flies are gone.
Does Australia have drain flies?
Yes, Australia does have drain flies, commonly known as filter flies or sewer flies, which can be a nuisance in homes.
Why do I suddenly have drain flies?
Drain flies appear suddenly due to stagnant water in areas like slow drains, unused toilets, or leaking pipes. To eliminate them, identify and address these sources of moisture.
What are the common signs of a drain fly infestation?
Common signs of a drain fly infestation include the presence of small, moth-like flies near sinks and drains, as well as larvae found in moist, organic-rich areas. Addressing these signs promptly can help eliminate the problem.
How long does it take to get rid of a drain fly infestation?
To effectively eliminate a drain fly infestation, it generally takes a few days to a week, depending on the severity and treatment methods applied. Consistent monitoring and sanitation practices will expedite the process.