We’re all Aussie homeowners. And one of our constant worries is about how long do hot water systems last. After all, a hot shower or bath or a steaming pile of dishes is a crucial part of our happy daily life, but we only ever take it for granted once something goes BANG! Cold showers as the cold season approaches? No thanks! Massive unexpected bills amid a cost of living crisis! No way!
How long does a hot water system last, really?
How long do solar hot water systems last? No, take a deep breath because it doesn’t matter what type of hot water system you have. How often do you wonder how long do electric hot water systems last? Or gas. Or solar. Or heat pump? No matter the technology, age or type, there are plenty of factors that are relevant here. Usage. Maintenance. Environmental conditions in Sydney and beyond. Because no, it’s not just a simple question of time. That’s why we’ve diving deeper into understanding how long do gas hot water systems last – and the rest of them! We use all sorts of hot water systems in Sydney and beyond, so let’s seek both peace of mind and a plan for the future:
1. What type of system do you have?
This factor can be a big deal, because while electric and gas systems typically last 10-15 years, solar and heat pump models can last a little longer. So make yours long as long as it can, regularly check and clean the components specific to your system type – and by that, we mean clearing those solar panels or checking the anode in electric models. Need help? Jump to the bottom of this blog!
2. What’s your water quality?
You should also know about the quality of your tap water. If you live in a region with particularly hard water, that can really start to build up scale in your system. What does that mean? We’re talking about reduced efficiency and lifespan. To help things, install a water softener or get your system regularly descaled to mitigate the effects.
3. How often is that system used?
If you’re really stressing your hot water system, be aware that wear and tear is only being accelerated. So watch that hot water usage, and before you do that make sure that the size of your hot water system is enough to accommodate your household’s needs.
4. What’s your maintenance routine?
A bit lazy with maintenance? We all are, but if you keep up with that upkeep, you keep total system failure at bay. Schedule an annual inspection, get that maintenance done, and flush the tank. And check the pressure relief valves!
5. Are there environmental factors?
Yes, there are definitely environmental factors! It could be harsh weather or heavy hail, but no matter how cold or hot it gets, it matters when it comes to the system’s durability. Are your external components protected by insulation or weatherproof covers? Have you asked a local Sydney plumber about adequate ventilation for the indoor and outdoor units?
DIY VS professional hot water system maintenance
Understand these factors deeply, and homeowners are on the way to extending the life of their hot water systems. From a complex issue to regular maintenance, seeking affordable and professional help is the most obvious answer here. Rapid Service Plumbing offers comprehensive plumbing services in Sydney, including emergency plumbing, blocked drain solutions, gas fitting, hot water systems and more. Give us a call today.
So, how long does a hot water system take to heat up? We know it’s frustrating to wait – especially if you think something might have gone wrong with your expensive unit that you rely on each day for showers and baths. But perhaps you’re browsing for a new system and want to know what to expect – like if you’re tossing up between a tankless vs a traditional tank system or perhaps even a state-of-the-art heat pump. Or maybe you’re just curious.
How long does it take for a hot water tank to heat up?
First, let’s do some troubleshooting! We know you’re shivering in the bathroom waiting for that freezing cold water to heat up, so let’s see what’s going on whilst pondering the question: How long does it take for hot water to heat up?:
Troubleshooting hot water system heat-up delays
1. Check power sources
Is your system even connected to its power source? If it’s electric, that means checking the circuit breakers. And for gas systems? How long does a gas water heater take to heat up? A bit faster than electric, but let’s start with peering into the system to look for the presence of that pilot light.
2. Inspect thermostat settings
Next, let’s verify that the thermostat is set to an appropriate temperature – because if it’s set too low, it’s not going to be hot enough! However, your system should be set to a standard, regulatory-compliant temperature.
3. Evaluate tank capacity vs. usage
Do you have a tank-based system? If you do, perhaps you’ve just run out of water! If the stored water is all gone, your system won’t be able to catch up as you stand there waiting for it. This leads to the question, “How long does it take for a hot water tank to heat up?” Understanding this can help you manage your expectations and plan accordingly for your hot water needs.
4. Look for leaks
Put your clothes back on and head outside to your system. Do you see your hot water system badly leaking? A few drops here and there are fine, but something very soggy could be a major problem.
5. Could it be sediment build-up?
In storage systems, sediment accumulation at the bottom of that tank is something that can act as a barrier to heat transfer. It could be time for a flush.
6. Check for faulty heating elements
You might also need to look into whether your hot water system has a faulty heat element, especially if you’re asking, ‘How long does an electric hot water system take to heat up?’ This could be a key factor affecting the heating time of your system.
7. How old is your system?
If your system is past its prime, it may be struggling for heating efficiency. Maybe that means waiting a little longer for water – or maybe it’s time to call the plumber!
Quick or slow?: Unpacking the factors behind water heat-up
So, you’ve run through 1 to 7 and there’s nothing obviously wrong? Maybe you’ve just run into a few of the major factors that impact how quickly your hot water system can heat up. Remember, it’s not always just about patience, but a complex mix of science and system specifics.
System type: If it’s a fully-functioning tankless (or instantaneous) hot water system, that should give you hot water very quickly – we’re talking within a few seconds. A tank system, though, can take a while for the hot water to reach your tap.
Tank capacity: What is the size of your hot water system? Is it a particularly big one? It should be chock-full of hot water, but if you’re waiting for it to heat up, that’s going to take quite a bit longer.
Energy type: Gas or electric? If electric, it can take longer to heat up than gas. But it’s not going to make a huge difference, to be honest.
Initial water temperature: How cold is the weather out there? If it’s the dead of winter, it’s time to be patient because you’re asking your system to work a lot harder to reach the desired temperature.
Thermostat setting: Your thermostat should be at a fixed temperature, but if you’ve cranked it all up to something particularly hot, that will take longer once you turn that hot tap.
System efficiency: Is your system brand new or quite old? If the latter, expect a longer wait time – or start looking into a repair, some maintenance, or something brand new.
Usage patterns: Do you have two or even three showers or baths? If so, if you’re trying to churn out hot water at the same time, that could mean seriously extended heating times.
Rapid Service Plumbing: Tailored solutions for your hot water needs
Think of your hot water system like a living, breathing piece of technology. Does it need a little TLC? From installation to repairs, maintenance, regular servicing and beyond, the friendly team at Rapid Service Plumbing offers expert guidance and a range of services tailored to your needs around the clock. Why not give the team a shout today for an obligation-free quote? We can’t wait to hear from you!
Electric hot water system not working like it used to – or at all? It’s a tale as old as hot water systems themselves: you’re ready for a relaxing shower, only to be greeted by an icy torrent that sends shivers down your spine. Yes, hot water system issues are not just annoying – they can seriously disrupt the daily routine and trigger temper-tantrums all across the household. But here’s a little-known fact: when it comes to hot water system woes, electric models take the cake for causing more headaches than their counterparts. Why, you ask? Well, it’s a combination of their widespread use, intricate electrical components, and the need for regular maintenance that often goes unnoticed.
But let’s stop fretting, because we’re about to dive into the ultimate troubleshooting guide for those pesky electric hot water system problems. So, grab your notepad and keep that dry towel and body wash handy – because help is on the way!
Why is my electric hot water system not working? A progressive troubleshooting guide
Let’s take a progressive approach to resolving your electric hot water issue. Though it might seem daunting, especially when you’re faced with something like your hot water system not heating, there’s a chance it could be a simpler fix than you think, one you might be able to handle yourself. Of course, it could also indicate a need for a plumber or a new system, but let’s not jump to conclusions just yet.
1. Have you run out of water?
If you’ve got a storage-based system, the problem could be as simple as an empty tank! You might have a ‘boost’ button that can start to heat a new batch immediately, but you might also need to wait until the morning.
2. Check the power source
Your electric system isn’t going to do much without electricity! It’s frustrating when you encounter something like your electric hot water not working, but with a bit of luck, it’s not a serious power issue or a deeper wiring problem. Rather, it could be something as simple as a tripped breaker or a blown fuse that needs dealing with.
3. Can you adjust the thermostat?
Across the country, hot water systems are basically set at a pre-determined level in compliance with regulations. However, if you’re facing an issue with an electric hot water system not heating up, it could be as simple as the thermostat settings being set too low for a satisfying shower.
4. Is it a high-temperature cut-off?
Similarly, if you’re dealing with your electric hot water system not heating, it could be that the upper thermostat on your unit has a cut-off switch that has tripped due to excessive heat. Simply hitting the reset button might be the quick solution you need. After resetting, give the system some time to get going again.
5. Is your hot water system leaking?
When you notice moisture or water pooling around your hot water system, it’s a clear sign of a leak – and potentially a big problem waiting to unfold. Leaking hot water systems can range from simple issues like loose connections to more serious problems such as a cracked tank.
6. Low hot water pressure
Experiencing a disappointing trickle when you were hoping for a powerful, hot shower is not only frustrating but could indicate a problem with your hot water system or the plumbing. Here are steps to diagnose and potentially fix low hot water pressure
7. Check the heating elements
It’s very common for the heating elements to become coated with mineral deposits – or simply burn out. It’s possible to test them with a multimeter, but you may need help with that – especially if you find you need a replacement.
8. Is it time for a flush?
Part of your system’s normal maintenance regimen is a simple tank flush – which basically involves emptying the tank completely so that it can re-fill with fresh water.
9. The thermostat could need replacing
If you’re sure all the settings are right and your unit has power, it might be the thermostat that has seen better days. Replacing it will require a call to a licenced plumber near you.
10. Corrosion or tank damage
Perhaps you haven’t kept up to date with checking (and replacing) and sacrificial anode rod – the component that sits inside your tank with the express task of attracting corrosion away from your precious tank. Unfortunately, if the tank is badly corroded or otherwise damaged, the entire system will probably need to be replaced.
11. Which brand is your system?
We have some detailed guides for different hot water brands. So if you’re troubleshooting a Rinnai hot water system or trying to fix a Rheem hot water system dive deeper there.
12. Call a hot water plumber
Have you run through the steps? No success? Don’t panic: because Sydney’s favourite 24-hour hot water plumbing service is always just around the corner. Perhaps it’s an internal blockage, maybe it’s a complex mechanical failure, or perhaps it’s a super-easy fix – or maybe it’s simply time to explore your options for a shiny, brand-new hot water system.
Expert advice for an electric hot water system not working
Remember, while some hot water fixes are straightforward, electrical systems can be dangerous – and there are plenty of regulations restricting what you’re allowed to do with your hot water system. If in doubt, give the friendly team at Rapid Service Plumbing a call – we’ll be right there! Inner West hot water, Sutherland Shire hot water, North Shore hot water and Sydney wide.
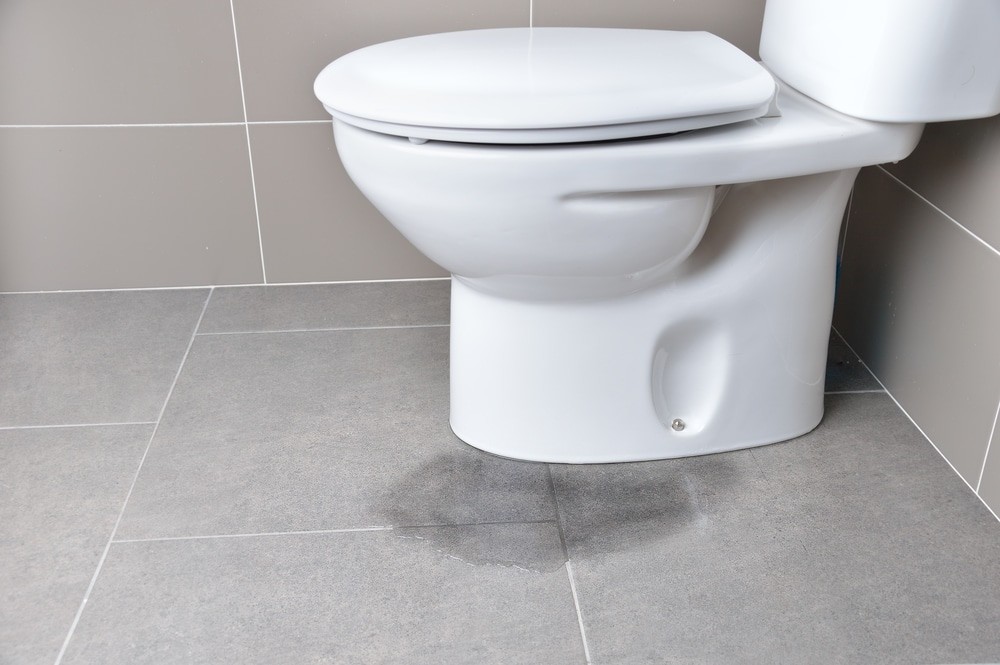
Is that the dreaded sound of a leaking toilet cistern – that ‘trickle, trickle, trickle’ is a never-ending, irritating symphony in your home’s smallest and most hard-working room. But even if you can cope with the annoying dribble, it can quickly escalate into a seriously watery nightmare, hiking up your water bills and threatening water, plumbing and other damage.
Mastering the art of fixing a leaking toilet cistern
But don’t worry, because you don’t need to be a toilet plumbing specialist to start to get your head around this. Our easy, step-by-step diagnostic guide is here to help you pinpoint the problem with a toilet cistern leaking and guide you towards the next steps to fix it. So, together, let’s dive into the porcelain throne and fix that drip!:
Step 1: Confirm the leak
You’ve already heard that trickle, trickle, trickle, but let’s also give that entire toilet a decent visual inspection too to check for any obvious cistern leaking in and around the tank but also the base and the supply lines too. And is the whole toilet loose? Simply tightening the base bolts could fix that.
Step 2: Check the cistern water level
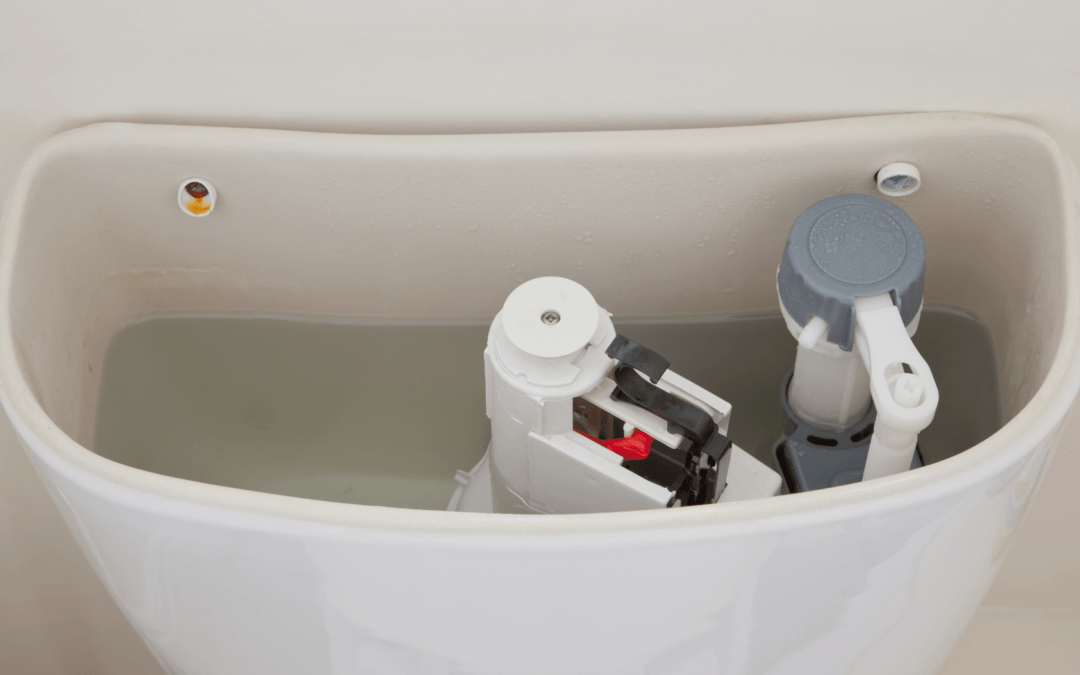
If you have a dripping toilet cistern, let’s see what’s going on inside. Remember, the cistern is the tank that holds the water ready for the next flush. The lid of the cistern should be easy enough to remove, but be careful not to break it as they can be difficult to replace.
Look at the water level – is the top of the water a few centimetres or so below the overflow tube? If it’s too high, make an adjustment to the float mechanism to lower it a little. With a bit of luck, that will stop the system from its constantly toilet cistern dripping state.
Step 3: Test the flapper valve
The flapper valve is a fairly basic rubber seal that controls the release of water from the tank into the bowl when you hit the flush button – and it’s critical for maintaining the proper water level, especially when dealing with a leaking cistern.
Inspect it: Check the flapper for signs of wear, warping or damage, especially if you suspect toilet cistern leaking into the bowl. If you think that could be the culprit, you can try to replace it yourself – as long as you’re confident you’re not going to make your misbehaving toilet problem even worse!
The food colour test: By adding a few drops of food colouring to the cistern water, you can test the performance of your old (or new!) flapper valve when dealing with toilet flush leaking. Simply wait 30 minutes after adding the colour – and if the water in the bowl starts to become colourful, the flapper valve may well be leaking.
Step 4: Inspect the fill valve
Toilet system leaking? Look for a metal or plastic cylindrical body called the fill valve – a crucial component for regulating the way water is supplied to the cistern.
Listen for hissing: Is it hissing? That’s the classic sign of a fill valve on the way out.
Adjust or replace: Look for an adjustment screw or knob, and turn it clockwise to increase the water level or anti-clockwise to decrease it until you find the sweet spot. If the valve is damaged, though, it will need replacing.
Step 5: Check the flush valve and flush mechanism
Next up, let’s zoom into the flush valve seal and the flush mechanism. The seal is just a rubber/silicone ring to create a watertight seal during the flush, while the mechanism itself is what you press in order to flush the toilet.
Seal: Give it a good once-over for signs of wear or damage.
Mechanism: Is the button or handle sticking or loose?
Step 6: Can you DIY or do you need a plumber?
Sometimes, you can get away with a quick DIY fix, with minor toilet issues among the few plumbing tasks you are allowed to try for yourself without a plumbing license. But for major water leaks, cracks or more complex problems, it may be best to get professional help right from the start:
Simple fix: If you’ve traced your toilet problem to the flapper, fill valve or the need for a minor adjustment, go for it if you’ve got the basic skills, knowledge, tools and confidence.
Call a plumber: For everything else, or if you’re just not sure, don’t worry – because a top plumber in Sydney is only ever just around the corner.
Decision time: DIY or professional help?
A misbehaving toilet can sometimes feel like a big problem, but thankfully it’s one of those household problems that can be resolved with a bit of DIY grit and know-how. But even when that leaky throne overwhelms you, Rapid Service Plumbing will be there for you. Across Sydney and beyond including Canterbury-Bankstown, City of Sydney, Eastern Suburbs, Hills District, Inner West, Sutherland Shire, North Shore and Northern Beaches, we offer 24/7 service, obligation-free quotes, guaranteed workmanship and no call-out fees. Flush all of your worries away by giving the friendly team at Rapid Service Plumbing a shout today.
You sit on the bowl, but without the cistern – the tank that holds the water ready to flush – it’s not going to be a very pleasant experience! If it’s time for a replacement toilet cistern because it’s cracked, otherwise badly damaged or just time for a modern upgrade, a full replacement is not that hard to do.
Is replacing a toilet cistern illegal?
First, a warning: In NSW, like most other states in Australia, plumbing codes require you to have a valid plumber’s license for any major plumbing work other than changing a washer, swapping out a showerhead or fitting a new toilet seat. This includes replacing a toilet cistern only. So check with your local council before you repair or replace a toilet.
Australian Plumbing Regulations for Cistern Replacement
Toilet cistern replacement falls under the Plumbing Code of Australia (PCA). This national code sets the minimum requirements for plumbing and drainage installation work. While DIYers may be tempted to do this job, in most states and territories in Australia, this work must be done by a licensed plumber to comply with local regulations and standards.
Your Toilet Cistern
Before you start replacing, you need to understand your toilet cistern components. A typical cistern has:
The tank
The flush valve
The fill valve
The flush button or lever
The overflow tube
The flapper or flush seal
Each of these parts is important to the flushing mechanism and understanding what they do will help you diagnose and make informed decisions.
Types of Toilet Cisterns
Toilet cisterns come in different types, each with its own benefits:
Close-coupled cisterns: The most common type where the cistern is attached to the toilet bowl.
Wall-hung cisterns: Mounted on the wall, saving floor space and looks modern.
Concealed cisterns: Hidden in the wall cavity for a sleek look.
High-level cisterns: Traditional style where the cistern is mounted high on the wall.
When replacing your cistern, make sure the new replacement cistern is compatible with your existing toilet bowl and bathroom layout.
When to Replace Your Cistern
Common signs it’s time to replace your cistern include:
Leaks that can’t be fixed with a simple repair
Cracks in the cistern body
Frequent blockages or incomplete flushes
Excessive water usage due to old technology
Visible wear and tear or cosmetic reasons
In some cases, changing toilet cistern components can be a straightforward and affordable solution to these issues.
Choosing a Water Efficient Cistern
When choosing a new cistern, consider its water efficiency. The Water Efficiency Labelling and Standards (WELS) scheme in Australia rates water-using products. Look for cisterns with high WELS ratings to save water and reduce your water bills. Modern dual-flush systems use much less water than old single-flush models.
Tools and Materials
What you may not know is that while it’s the most used seat in your home, replacing the cistern isn’t too hard if you have the courage and basic skills. Here’s what you’ll need:
New cistern (including bolts)
Adjustable wrench
Screwdrivers
Sponge, towels & bucket
Plumber’s tape
Rubber gaskets & sealant
Pipe cutter (if needed)
Level
Measuring tape
Inlet pipe
Cost of Replacing Toilet Cistern
The cost of replacing a toilet cistern will vary:
Type and quality of new cistern: $100 – $500+
Professional installation (if required): $150 – $300
Additional materials: $20 – $50
DIY will save on labour costs but make sure you’re confident in your skills to avoid costly mistakes.
How to Replace a Toilet Cistern in 7 Easy Steps
Step 1: Prepare
Turn off the water supply at the mains and at the valve behind or next to the toilet. Now flush the toilet to get the water out of the cistern and use the sponge and bucket to get the last bits out before you replace the cistern. Ensure that the flush water properly enters the toilet pan and check for leaks after installation.
Step 2: Disconnect the water supply
At the bottom of the cistern you’ll find the water supply line. Remove it with the adjustable wrench and be prepared for a little more water to come out with the bucket and towels.
Step 3: Remove the old cistern
Unscrew the nuts that hold the cistern to the bowl – they’re at the bottom of the tank. If they’re corroded or stuck, try using some penetrating oil before you try again. Once they’re off, just lift the cistern off the bowl.
Step 4: Prepare the new cistern
Make sure you’ve already checked the new toilet cistern is compatible with your existing bowl and toilet setup so unpack it and follow the instructions to see if any parts need to be assembled before you install it. Put new rubber gaskets on the new cistern bolts so you have a watertight seal.
Step 5: Position the new cistern
The new cistern and the top of the toilet bowl should line up with the mounting holes so you can screw it in. When replacing a cistern be careful not to over tighten as it can damage the cistern or even crack the porcelain.
Step 6: Reconnect the water supply
Wrap the threads of the inlet valve with Teflon plumber’s tape – this is critical for a tight and permanent seal when replacing the cistern. Now just reconnect the water supply line to the bottom of the cistern with the adjustable wrench – and don’t over tighten!
Step 7: Test, seal & done!
Turn the water supply back on and you’ll know you’ve done it right because you’ll hear the cistern start to fill. Check the cistern for leaks while it’s filling and once you’re sure and the tank is full do a test flush. If everything’s working perfect add a bead of sealant around the base of the cistern so it’s all watertight for good. And now pat yourself on the back you’ve done it! You’ve learned how to replace toilet cistern parts and it all works!
Safety Precautions and Considerations
When replacing a toilet cistern, it’s essential to take necessary safety precautions to avoid injuries and ensure a successful installation. Here are some key considerations:
Turn off the water supply: Before starting the replacement process, make sure to turn off the water supply to the toilet cistern. This will prevent any accidental water flow and minimize the risk of flooding.
Wear protective gear: Wear gloves, safety glasses, and a face mask to protect yourself from any potential hazards, such as sharp edges or chemical splashes.
Use proper lifting techniques: When lifting the old cistern or the new one, use proper lifting techniques to avoid straining your back or injuring yourself.
Check for electrical connections: If your toilet cistern has any electrical connections, make sure to disconnect them before starting the replacement process.
Follow manufacturer’s instructions: Always follow the manufacturer’s instructions for the new cistern, and take note of any specific safety precautions or recommendations.
By taking these safety precautions and considerations into account, you can ensure a safe and successful toilet cistern replacement. Remember, safety first!
Cistern Maintenance
To keep your new cistern running for years to come:
Check for leaks
Clean the cistern interior every year
Replace flush mechanism parts every 4-5 years
Don’t use harsh chemicals that can damage seals and components
Cistern Troubleshooting
Even with a new cistern you may still have some issues. Here are quick fixes for common problems:
Running toilet: Check the flapper seal and adjust the fill valve
Weak flush: Check the water level
Filling noise: Clean or replace the fill valve
Sweating cistern: Insulate the tank or install an anti-condensation tank
Modern Cisterns are Good for the Environment
Upgrading to a modern cistern can have many environmental benefits:
Less water usage
Less energy to treat and distribute water
Less strain on the water infrastructure
Potential to use recycled materials in cistern production
By choosing an eco cistern you’re helping with water conservation and reducing your footprint.
Conclusion
Replacing a toilet cistern can be a DIY-friendly task, but it’s essential to approach it with caution and attention to detail. By following the steps outlined in this guide, you can successfully replace your old cistern with a new one and enjoy a more efficient and reliable toilet system.
Remember to always turn off the water supply, wear protective gear, and use proper lifting techniques to ensure a safe and successful installation. Additionally, make sure to follow the manufacturer’s instructions for the new cistern and take note of any specific safety precautions or recommendations.
If you’re not comfortable with DIY plumbing or if you’re unsure about any aspect of the replacement process, it’s always best to consult a licensed plumber. They can provide expert guidance and ensure a professional installation that meets local plumbing codes and regulations.
By replacing your old toilet cistern with a new one, you can enjoy a more efficient and reliable toilet system, reduce water waste, and save money on your water bills. So why wait? Replace your old cistern today and start enjoying the benefits of a modern and efficient toilet system!
Toilet cistern replacement – Made easy!
But don’t forget, fiddly DIY jobs – especially on your home’s critical plumbing functions – aren’t for everyone because they can turn a minor issue into a big, watery, expensive disaster! And in NSW as well as most other Aussie jurisdictions, work like this can only be carried out by a licensed local plumber in Sydney – like Rapid Service Plumbing right here in Sydney and beyond.Our expert services are tailored to meet the unique needs of each client Sydney wide, including Chullora, Darlington, Coogee, North Rocks and Beecroft. No matter what TLC your home’s hard-working throne needs or where you are, we do it all with obligation-free quotes, $0 call-out, a price match guarantee and fully guaranteed workmanship for life. Give Rapid Service Plumbing a call today – 24/7.. This version of your article includes all the recommended sections while keeping your original content. The new content has been added seamlessly to provide a more comprehensive guide to toilet cistern replacement covering all aspects from regulations and costs to maintenance and environmental benefits.
You listened to the marketing hype and decided to “Install a Rheem”? Good choice to keep that hot water coming on “Steady, hot and strong” – but what happens when yours stops working and you’re left with cold water after a long, hot day? Don’t worry, because like any appliance, they’re not perfect. But what do you do when your Rheem is no longer steady, hot and strong? Answer: Do some Rheem hot water system troubleshooting!
Electric Rheem Troubleshooting Guide
For electric Rheem systems:
Check the power supply and circuit breaker
Check the thermostat settings
Look for element failure
Check the pressure relief valve
If you’re not comfortable with electrical components, contact us now.
General Troubleshooting Steps
Check for Error Codes: If you have a continuous flow Rheem, familiarise yourself with the error codes that flash up when something’s gone wrong. Look up the Rheem code and follow the instructions.
Read the Rheem Troubleshooting Guide: This guide covers a wide range of issues across the whole Rheem HWS range, not specific to a particular model or type.
Check for Water Leaks: Understand how your system’s temperature relief and expansion control valves work. A little water discharge is normal during the heating cycle.
Fix Temperature Fluctuations: Check if your heater is being affected by water flow restrictors or water-saving low-flow taps.
Solar Rheem Systems: Common Problems and Solutions
Solar hot water systems have their own unique issues:
Check for shading on solar collectors
Check the pump is working
Check the backup electric or gas booster is working
Look for glycol leaks in closed-loop systems
Do you have a heat pump?
Are you benefitting from the superior energy efficiency and smaller carbon footprint of a Rheem heat pump? You’ll also helpfully see fault codes indicated through the flashing lights on the controller, and they will vary depending on the model – for instance, the codes for the 310L model are different from the 325L model because of the specific operational issues they face.
How to Reset Your Rheem Hot Water System
Resetting your Rheem system will often fix minor issues:
Turn off the power
Wait 30 seconds
Turn the power back on
Let the system heat up and check it’s working properly
Note: Reset procedures may vary by model, check your user manual for specific instructions.
Your Rheem is reliable but it’s still a complex piece of technology. Hopefully our Rheem hot water systems troubleshooting guide has fixed the issue but if not or you’re sure something more serious is going on, call the friendly team at Rapid Service Plumbing. We’re available 24/7 in emergencies, we offer no obligation quotes and upfront pricing and we guarantee our workmanship – forever! Our plumbers service the greater Sydney areas including Canterbury-Bankstown, City of Sydney, Eastern Suburbs, Hills District, Inner West, Sutherland Shire, North Shore, and Northern Beaches. Not only that, our Melburnian neighbours can now experience high-quality plumbing services as we have expanded to Melbourne! Rapid Service Plumbing is only ever a single call away for advice and a rapid response, so don’t hesitate to get in touch.
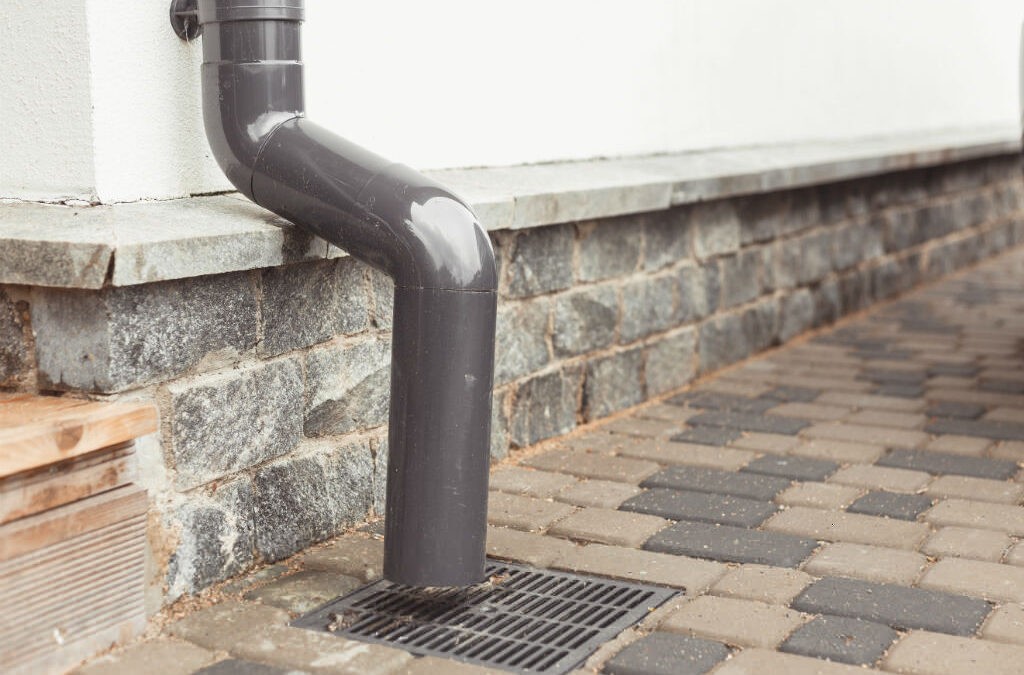
It’s a question we hear all the time – Do downpipes have to be connected to stormwater by law or regulation? We all know that local rules can be complicated and strict, so we want to do the right thing – but unfortunately, the answer is a little muddy and depends on specific council bylaws and circumstances. Generally, the answer is yes – connecting downpipe to stormwater is required, so that your stormwater is effectively managed and flooding and damage to your and neighbouring properties is minimised.
Do downpipes have to be connected to stormwater NSW?
As for the specific regulations, permits or approvals that apply to your particular circumstances, that’s something your local Sydney plumber can help you with.
But if you’re asking whether downpipes connecting to stormwater is a good idea, the answer is easy – most definitely yes!:
1. It’s just proper stormwater management
If that water has nowhere to go except into your stormwater drainage system, you won’t ever need to worry about water damage, flooding, erosion, and foundation damage.
2. Your property won’t be damaged
The primary reason for connecting downpipes to stormwater drains directly is to look after your foundation or other vulnerable areas of your own and surrounding properties.
3. Your landscaping won’t be damaged
You love your gardens, lawns and plant beds, right? Well, to look after them and keep them looking great, a direct downpipe connection is the ideal solution.
4. You won’t deal with soil erosion
When stormwater runoff is uncontrolled, the soil has no chance to get washed away and creating deep and serious erosion issues. The stability and quality of the soil surrounding your property are effectively guaranteed with a direct stormwater connection.
5. It’s safer
Pooling water is a major problem for various reasons, but one of them is to prevent slips and falls.
6. It makes rainwater harvesting easy
Why not direct your stormwater from the roof to your gutters, downpipes and straight into a rainwater tank – with all of the various and numerous benefits?
7. It’s just the responsible thing to do
You like being a responsible member of your community, don’t you? Ensuring your stormwater is impeccably managed protects local waterways, reduces the risk of pollution, and contributes to the overall well-being of the entire local community.
So how’s it done? Bear in mind that the specific installation process suitable for your particular building structure, materials, local regulations and preferences may differ – but your plumber will basically:
Plan & prepare by looking at the downpipe outlet locations and desired path
Cut the outlet on the fascia/eaves
Install the downpipe, connect the various sections, and fasten for stability
Create the stormwater connection by locating the connection point, determining the connection type, and ensuring a watertight connection
Test and adjust the final product by checking for leaks, adjusting the alignment, making modifications, and securing the fasteners/brackets.
Connecting a downpipe to stormwater with our help
Just want Rapid Service Plumbing to do all that difficult connecting downpipe to stormwater work for you? Our fully-licensed plumbers are ready to solve this and all other plumbing, drainage and stormwater system problems for you 24/7 – From the Hills District to the Upper North Shore, Sutherland Shire and everywhere in between. Plus we always offer no-obligation quotes, fixed upfront pricing and 100% guaranteed workmanship on every job big and small. Call the friendly team at Rapid Service Plumbing today.
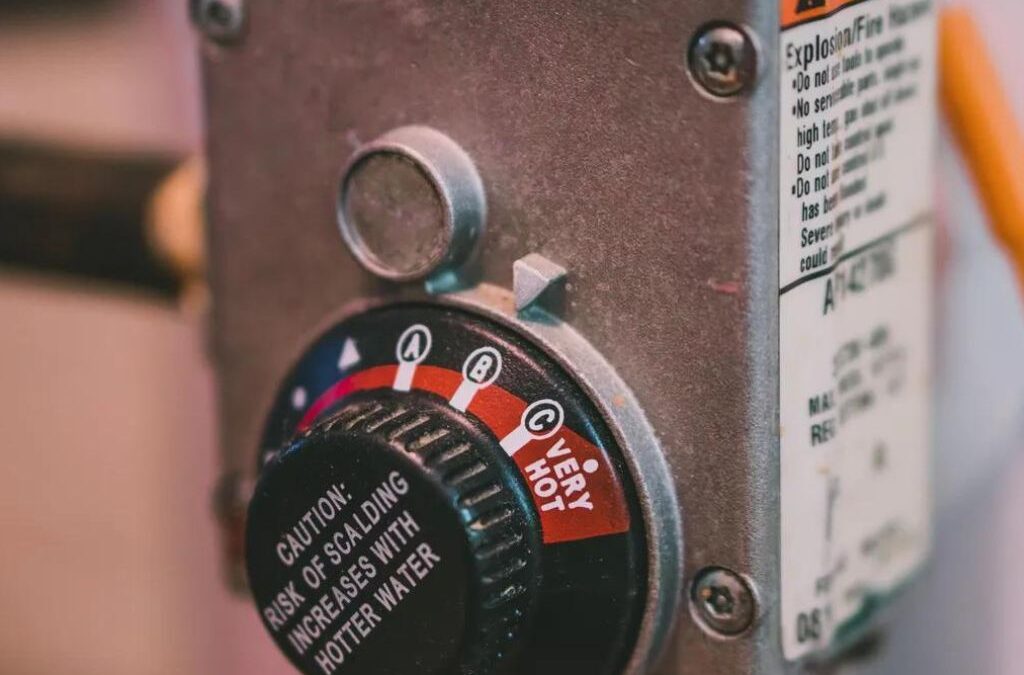
Do you love your daily hot shower or bath? You’re not alone – and there’s no need to be embarrassed about it because we all feel the same! Steaming hot water feels like just as much of a human right as anything else that is essential for a comfortable, convenient life. Although entirely subjective, most people report that the loveliest temperature for that daily wash & relax is somewhere in the region of 38 to 43 degrees – but there are definitely some regulations to know about here in New South Wales as well. So let’s take a deep dive into the rules surrounding hot water temperature NSW-wide. But before we do, you may be wondering about it because:
In these cases it could be a problem with your hot water system leaking or otherwise in need of repair. Maybe your hot water system size is inadequate or there’s another issue with settings or pipes.
Regardless, you don’t need to put up with it when there’s a Sydney emergency plumber at Rapid Service Plumbing standing by! So, what temperature should your hot water be and why?
Hot water temperature regulations NSW
In part, the ideal hot water temperature is about looking after your hot water system and preventing the growth of harmful Salmonella and Legionella – which is why your system stores that hot water at least at 60-65°C.
But at that temperature, children, the elderly and other vulnerable people – and even the rest of us – are at an unacceptable risk of scalding. That’s where thermostatic mixing valves come in, which automatically blend that searing hot water with cold water to achieve a safe and still-comfortable temperature whilst still minimising bacteria growth.
Temperature of hot water full Q&A
So what do you really need to know about the rules regarding hot water system temperature in NSW? We’ve heard all your questions, and here are all the answers:
Q: What is the maximum recommended temperature for residential settings?
To keep it simple, the hot water tap temperature needs to be 50C for most run-of-the-mill residential settings.
Q: Is this the same for everywhere in Australia?
Basically, yes. But, you should definitely check what the specific rules are in your particular state, although 50°C is a basic standard country-wide.
Q: Why is 50°C the ideal temperature for hot water from taps?
Well, at 65-70°C, a full-thickness scald occurs in less than one second – and hot water burns are considered some of the worst possible. At 60°C, it takes 5 seconds to similarly harm yourself with a third-degree burn, which can result in:
Extensive tissue damage that will not heal on its own
Loss of sensation/nerve damage
Scarring & disfigurement requiring skin grafts or surgery
Heightened infection risk
Long-term impairments & need for rehabilitation
But at 50°C, it takes five minutes of constant exposure to produce the same kind of damage.
Q: Are there any hot water temperature standards other than 50°C?
Yes – for child care centres and preschools in NSW, as well as primary and secondary schools, nursing homes and other facilities like that, the maximum is actually 43.5°C.
Q: How are these precise temperatures achieved?
We’ve referred already to thermostatic mixing valves, but there are other tempering valves that can do the job. Also, some hot water systems are pre-manufactured with max temperatures of 50°C.
Q: Who can install these devices for me?
To comply with the domestic hot water temperature regulations across NSW and beyond, as well as building codes and all other rules, you’ll need a licensed and qualified hot water plumber. They’ll ensure the installation adheres to all relevant state and local rules as well as Australian Standards, local building codes, and the guidelines set out by the NSW Department of Fair Trading.
Let us deal with hot water temperature for you
Just need a friendly, local Sydney plumber to handle all of those complex hot water temperature regulations NSW-wide for you? No matter your plumbing problem, the highly experienced team right here at Rapid Service Plumbing is always just around the corner – and available 24/7 with fixed pricing and fully-guaranteed workmanship. For a chat or obligation-free quote, get in touch right now.
3 metres x 2 metres – that’s the average size for a bathroom in Sydney. At 6 square metres, that may sound small, but it’s actually enough to fit in a toilet, shower, vanity and cabinetry – and even a bath as well if you really need it! But it’s very possible that you have a bathroom space that is actually quite a bit smaller than that – and it can most definitely feel extremely squeezy without some of the smartest small bathroom ideas incorporated into the design.
The best small bathroom ideas in Sydney
But without even throwing out any of the basic amenities, fixtures and luxurious features you need in there, a small bathroom design can actually feel a lot roomier simply by renovating in adherence to some basic techniques for a real-life illusion of space. Here’s how:
1. Light colours
Stay away from the dark and bold colours that draw attention to the confined size and create a cramped atmosphere, and instead and make your tiny bathroom designs light, neutral, bright and open all around.
2. Natural light
You don’t need extra room to add a bigger window or a big, bright skylight, with all that extra natural light creating an airy and open atmosphere. For the window coverings, make them sheer or translucent if possible.
3. Artificial light
Light, light, light – the best small bathroom designs have a lot of light, whether natural or artificial. Get rid of the dark shadows and create an illusion of depth with targeted, task and accent lighting – with recessed lights adding extra space.
4. Mirrors
For a true illusion of space, you can never go wrong with mirrors. Make them large, multiple, and near the light sources as they magically open up space beyond the walls and bounce light all over the place.
5. Wall-mounted fixtures
In every way you can, opt for wall-mounted bathroom fixtures if possible. That goes for the toilets, the vanities, the cabinets and everything else – because it frees up floor space, creates a sense of openness, and eliminates the feeling of clutter.
6. Glass or open showers
For the shower, go for glass rather than frosted or a curtain. But an even better solution among these bathroom ideas for small bathrooms is to consider an open or doorless shower, which if designed well doesn’t need a screen at all.
7. Minimalism
If you can live without a bath, give it a miss. In fact, get rid of as much as you can as a general principle, including accessories, storage, furniture and purely decorative or luxury elements – because pure stylish functionality and open and clear sightlines are much better than an overwhelmed and cluttered space.
8. Smart storage
For the storage you will have, stay away from bulky cabinets or vanities and opt for open shelving or recessed storage niches.
9. Vertical design
Wherever you can add tall, vertical lines to your small bathroom ideas to draw the eyes upwards and create an illusion of height – like vertical stripes in the wall art or tall, slender fixtures such as floor-to-ceiling storage.
10. Continuity
Consider the same design for both the floors, walls and even the ceiling – a simple, seamless and visually-striking trick that tricks the eyes into thinking they’re looking at a much bigger space thanks to the elimination of boundaries.
11. Sliding doors
Create extra usable space by installing sliding rather than the usual swinging doors.
Is your bathroom tiny – and do you need us to help implement some of the best small bathroom ideas Sydney-wide & beyond with stress-free upfront pricing and a 100% workmanship guarantee for life? Give Rapid Service Plumbing a call today.
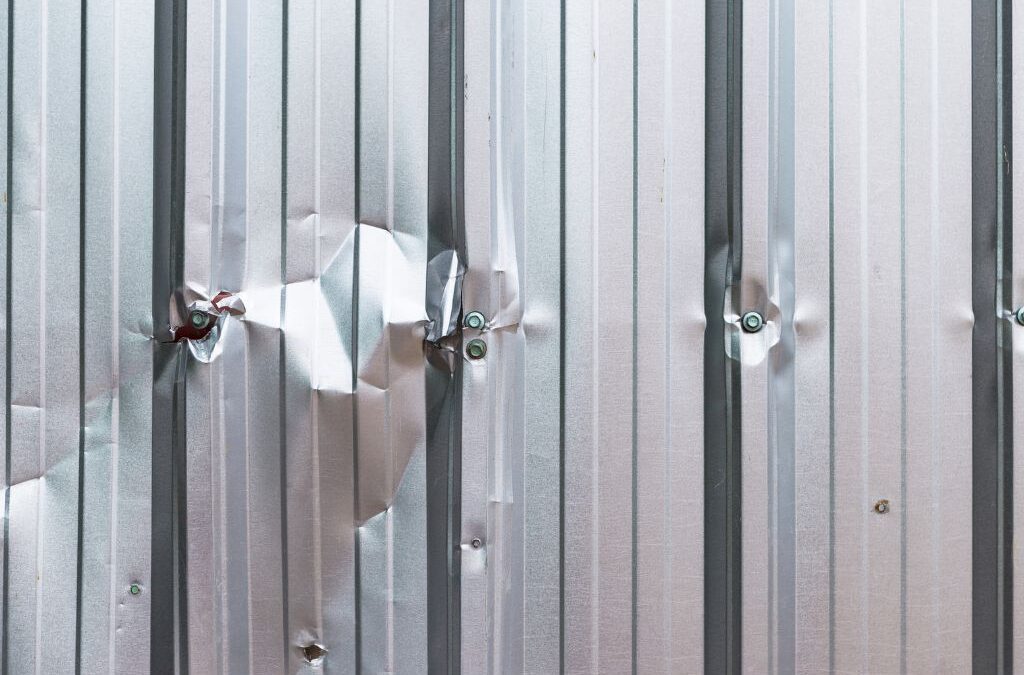
Is your roof looking a bit tired? Wondering what’s causing that water damage or missing shingles? As an Aussie homeowner it’s important to know the common causes of roof damage. This way you can protect your property and avoid costly repairs.
Our weather and the natural ageing process can damage your roof over time. In this article we’ll go through the 6 main causes of roof damage every Aussie should know. By knowing these and what to look out for, you can address minor issues before they escalate and necessitate replacing the entire roof. This proactive approach can keep your roof in top shape for years to come.
Quick Facts
Weather events like high winds, hail and heavy rain can cause roof damage
Natural ageing and lack of maintenance can cause wear and tear over time
Poor installation or cheap materials can cause premature roof failure
Blocked gutters and pest infestations are sneaky culprits to overlook
Regular inspections and repairs will extend your roof’s life
So let’s get started and find out why your roof is suffering. By the end you’ll know what to look out for. Then you can take action to keep your home safe and dry.
Weather Damage and Roof Leaks
As an Aussie homeowner it’s important to know how weather can damage your roof. Storms, hail and ice can all damage your roof over time. We’ll look at how high winds, hail and ice and snow can damage your roof.
High Winds and Storms
Severe storms can cause a lot of damage to your roof. Winds over 50km/h can lift and tear shingles. This lets moisture in.
If you see missing, curled or cracked shingles after a storm, fix them quick. This will stop more wind damage to your roof.
Roof Hail Damage
Hailstorms can damage your hail damaged roof badly, causing dents, cracks and holes. Hail can weaken your roof and make it more prone to leak.
If you’ve had a hailstorm, check your roof for hail damage. Get professional repairs if you find any damage.
It is crucial to file an insurance claim promptly after experiencing hail damage. Contact your insurance company to obtain estimates and secure reimbursement for the necessary repairs.
Ice and Snow Buildup
Ice and snow can damage your roof too, although it’s less common in Australia. When snow melts and freezes again it can block water flow. Trapped water can lead to a roof leak, causing ice damage and potentially resulting in moisture accumulation, which can lead to mould infestation and further structural damage.
Regular roof checks and good attic insulation can prevent ice and snow damage.
To see how weather can damage roofs in Australia, see the table below:
Weather Event
Potential Damage
Repair Urgency
High Winds and Storms
Missing, curled, or cracked shingles
High
Hail
Dents, cracks, and holes in shingles
Medium to High
Ice and Snow
Ice dams, leaks, and moisture damage
Medium
By fixing weather related roof damage quick you can keep your home safe. If you think your roof has been damaged call a professional for a check and storm damage roof repair.
Age and Wear and Tear
Even the toughest roofs can wear out over time. Roof lifespan depends on the material used. But all roofs will need a new one eventually. Knowing when to replace your roof can save you from costly repairs.
Asphalt shingles: 20-30 years
Terracotta tiles: 50+
Concrete tiles: 30-50 years
Metal roofs: 40-70 years
When your roof is reaching the end of its life look out for:
Cracked, curled or missing shingles or tiles
Rust or corrosion on metal roofs
Sagging or uneven roof deck
Granules from asphalt shingles in gutters
Daylight visible through the roof boards in the attic
Get a pro to check your roof regularly. They can spot problems before they get worse. Fixing small issues early can extend your roof’s life and avoid a full roof replacement too soon.
Poor Installation or Roof Repair Maintenance
Even the best roofing material can fail if not installed or maintained properly. Roof installation damage from poor work or neglect can cost a lot and shorten your roof’s life.
Poor Workmanship
Hiring an unskilled contractor can cause roof installation damage. Look out for:
Uneven or sagging roof deck
Improperly installed or missing flashing
Nails in the wrong place or overdriven
Not enough or improper sealing around vents, pipes and chimneys
Lack of Maintenance
Poor maintenance can also shorten your roof’s life. Regular checks and quick roof repairs are key to keeping your roof in good shape. Here are some important maintenance tasks:
Clean gutters and downspouts
Trim overhanging tree branches
Replacing damaged or missing shingles
Sealing around vents, pipes and chimneys
Insufficient Ventilation
Insufficient roof ventilation can cause heat and moisture to build up in your attic. This can age your roofing material too quickly. Roof vents help prevent heat and UV damage by reducing heat buildup in attics, which minimizes the risk of deterioration caused by prolonged sun exposure. Good ventilation keeps your attic cool and dry and prevents damage and mold. Make sure your roof has enough vents for airflow.
Pests and Debris
Your roof faces many threats, not just the weather. Pests and debris can also damage it and cost you big time if ignored. We’ll look at how animals and tree debris can damage your roof. However, while these issues are concerning, they do not always necessitate a full roof restoration.
Animal Intrusions
Animals like rodents, birds and insects can seriously damage your roof. They can make holes or gaps and let water in and cause more damage. Common pests include:
Rats and mice chewing through roofing material
Birds nesting in gaps or under eaves
Termites and carpenter ants weakening wooden structures
To stop pest damage to your roof try:
Prevention Method Description Regular inspections Look for animal signs and fix problems quickly Seal entry points Block gaps, holes or cracks to keep animals out Trim nearby trees Keep animals from reaching your roof with branches
Tree Branches and Leaves
Tree branches and leaves can also damage your roof. Branches can scratch or dent shingles and leaves can trap moisture and cause leaks. To minimize damage:
Trim trees near your home to prevent branch contact
Remove leaves and debris from your roof and gutters
Consider gutter guards to stop debris buildup
By addressing animals and tree debris early you can save your roof. This will avoid costly repairs from pest and debris damage.
Identifying Roof Damage
Identifying roof damage can be a challenging task, especially for homeowners who are not familiar with the signs and symptoms of roof damage. However, it is essential to identify roof damage early on to prevent further damage and costly repairs.
Signs of Roof Damage
There are several signs of roof damage that homeowners should be aware of. These include:
Missing or Damaged Shingles: If you notice that some of your roof shingles are missing or damaged, it may be a sign of roof damage. Missing shingles can leave your roof exposed to the elements, leading to further damage.
Cracked or Split Shingles: Cracked or split shingles can be a sign of roof damage, especially if they are caused by large hailstones. This type of damage can compromise the structural integrity of your roof.
Dents in Metal Roofing Material: If you have a metal roof, dents in the material can be a sign of roof damage. Dents can weaken the roof and make it more susceptible to leaks.
Cosmetic Damage: Cosmetic damage to your roof, such as cracks or breaks in the roof material, can compromise the structural integrity of your roof. Even minor damage can lead to significant problems if left unaddressed.
Leaks: Leaks are a common sign of roof damage, and they can cause significant damage to your home if left unchecked. Look for water stains on your ceiling or walls as an indication of a leaking roof.
Water Damage: Water damage can be a sign of roof damage, especially if it is caused by a leak in the roof. This can lead to mold and mildew growth, which can be hazardous to your health.
Sagging Roof: A sagging roof can be a sign of structural damage, which can be caused by roof damage. This is a serious issue that requires immediate attention.
Daylight Showing Through the Roof Boards: If you can see daylight showing through the roof boards, it may be a sign of roof damage. This indicates that there are gaps or holes in your roof that need to be repaired.
By being aware of these signs, you can identify roof damage early and take action to prevent further issues. Regular inspections and maintenance are key to keeping your roof in good condition.
Roof Leaks and Water Damage
Roof leaks and water damage can be a significant problem for homeowners. Roof leaks can cause extensive damage to your home, including damage to the walls, ceilings, and floors. Water damage can also lead to mold and mildew growth, which can be hazardous to your health.
We’ll deal with your roof problems for you
But wait – there is some good news! All of these issues can be minimised with regular roof inspections, proper maintenance, prompt repairs of minor issues, well-devised ventilation, quality installation and regular cleaning. And the even better news is that Rapid Service Plumbing is your friendlySydney roof plumber who can handle it all and even more including:
We’re even available24/7 for emergency plumbing and storm damage repairs, making us your one-stop shop for all of your plumbing,hot water,gas fitting, roof services and other general household and commercial plumbing needs and more. Get in touch withRapid Service Plumbing today for a no-obligation quote.
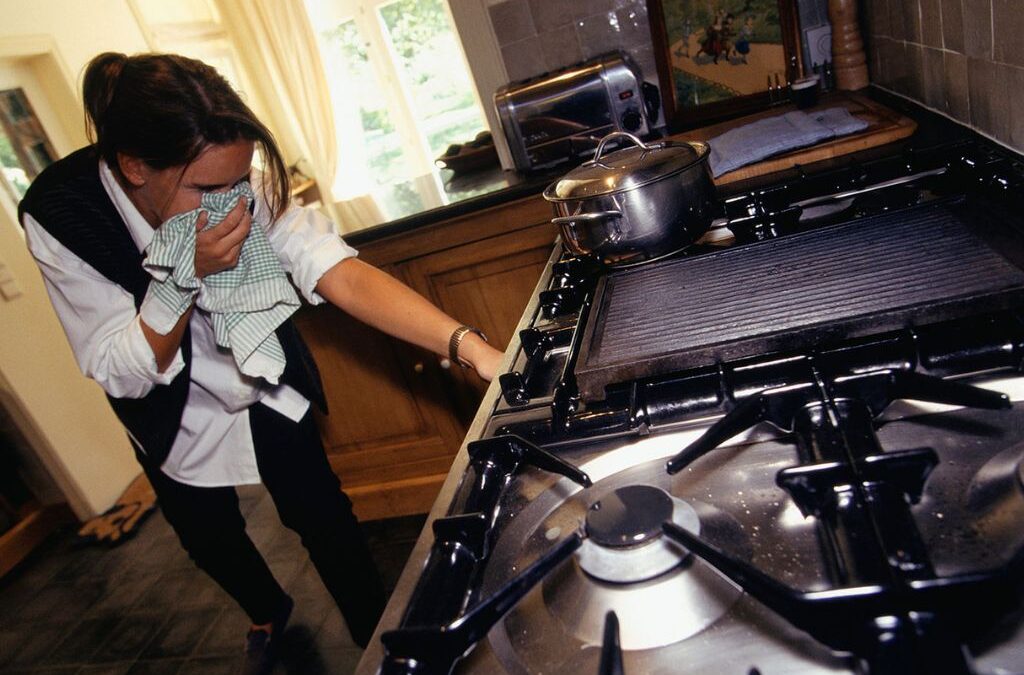
Spotting a huge spider or a menacing-looking rat is pretty scary, but so too is a sudden blackout or a light fitting crashing to the flood in the dead of the night. But do you know what’s even scarier when you’re at home? The whiff of gas. If your home is experiencing a gas leak, do you know what to do?
Gas leak – What to do
Do you smell rotten eggs?: That could be the additive called mercaptan, which is deliberately added to LPG and natural gas to make you worried.
Do you hear hissing or whistling or see hazy air?: That could be the alarming sounds and sights of escaping gas from a gas appliance, pipe or connection.
Has part of your garden died?: That could be an underground gas line experiencing a leak, causing discolouration or death of vegetation and plants.
Do you feel unwell?: A very slow gas leak can be impossible to detect until there’s enough in the air and your lungs to cause physical symptoms like headaches, dizziness, nausea or even difficulty breathing – and worse.
Gas leak in house what to do – 10 steps to follow
If you’ve got even a sneaking suspicion that gas could be leaking, it’s important not to panic – but you absolutely must act urgently and immediately. Do the right things and you, your home or building, and your family or clients will be just fine:
1. Act quickly & calmly
While you absolutely must not panic, that doesn’t mean you don’t have to act quickly and with purpose. So tell yourself that everything will be ok – and then let’s urgently proceed.
2. Evacuate
It’s important to get out of there – now. If you have time, open every door and window for ventilation, but otherwise, just make sure that all the people and pets leave as soon as humanly possible.
3. No flames or sparks
The absolutely worst thing you can do around leaking gas is to create even a single spark – because the next thing that could happen is a giant ‘KABOOM!’ That means not even turning on a switch, using any electrical equipment – even a phone.
4. Turn off the power
If you have time, turn off the mains electrical power. But if you don’t have time, just get to a safe location away from the property and wait for help.
Gas leak – Who to call in a gas leak
Now that you’re away from the property at a safe distance, and clear of any potential explosions, flames or gas fumes that may harm you and others, it’s time to call for professional help. Want to know what numbers to call?
If you still think the police need to know about your situation but no one’s life is in immediate peril, the number to call is 131 444.
7. 1800 GAS LEAK
You should also report a gas leak, especially if you can still smell it in the street or beyond your own home, by calling 1800 GAS LEAK (1800 427 532). Don’t worry, you can call 24 hours a day, 365 days a year.
8. Call your gas provider
There are multiple gas providers in and around Sydney, so whip out a gas bill and call the one that is relevant to your property. If they have a customer service or emergency contact number, that’s the one to call.
It’s also a good idea to give your neighbours a courtesy call to let them know what’s going on, or your property management authorities or landlord if you’re in a shared or rented property.
Gas leak what to do – Call Rapid Service Plumbing
Gas emergency all sorted? Remember, Rapid Service Plumbing also offer 24 hour Sydney emergency plumbers & gas fitting services – so if you detect that familiar and foul whiff of gas, give our friendly, licensed and attentive team a call and we’ll know exactly what to do instantly. Once any emergency is sorted, we’ll professionally inspect your entire gas system and all appliances to get to the bottom of what’s wrong and put it right or replace it.
Need a Sydney gas fitter? For 24/7 services, advice, obligation-free quotes and fully-guaranteed workmanship for life, Rapid Service Plumbing will know what to do if you have a gas leak. Never hesitate to give us a shout.
Kitchen sink hopelessly blocked? Try some baking soda, white vinegar and a kettle of water. Toilet backed up? It’s time to get that plunger out – and don’t spare the elbow grease! But while dealing with a run-of-the-mill internal household drain might sometimes be no big deal, it can be a completely different story if you’re dealing with an outside drain. So, today, we’re taking a deep dive into how to unblock a drain outside.
First, the good news: outside drain blockages are not only less common than sinks blocked up with food and gunk, but they’re also usually easier to clear. Why’s that? Because sometimes it’s just a visible and obvious obstruction caused by leaves and other storm debris after a serious downpour.
And now for the bad news: when you are dealing with an outside drain blockage and using your hands to pull out any debris hasn’t worked, you’ve suddenly got a more-difficult-than-usual plumbing problem on your hands.
7 steps for how to unblock a drain pipe outside
But don’t whip out the number of your friendly local plumber in Sydney just yet! Instead, put on your confident do-it-yourself cap and let’s have a go at being an amateur outside drain unblocker!
1. Find the offending drain
First, identify what outside drain is causing the problem. Found a drain cover and have no idea what to do? The wisest move is probably to skip to the final step right now to avoid making the situation any worse. Good try though, but we never promised that learning how to unblock an outside drain would be easy!
2. What’s gone wrong?
If you’re proceeding, well done to you! Now, ask yourself a few questions:
Is the blockage visible?
Does it look like simple storm debris?
Are you getting the feeling that drain/pipe damage has been done?
3. Grab your tools
If you’ve got a drain rod or something good enough to get the job done, let’s start with that. And while you’re grabbing yours, also locate your bucket, garden hose, gloves, and any protective gear to look after your eyes, mouth and airways.
4. Let’s get started
If you’re lucky, pull on those gloves and whip out all of the offending storm debris. Did that clear the drain? If not, you’re going to need your drain rod (or DIY drain rod) from the previous step.
5. Smash up the blockage
Are you using a DIY drain rod? If so, you may discover its limitations at this point – because with a real plumber’s drain rod, you can keep adding another section to get deeper and deeper into the blockage.
Just make sure, with all that smashing and whacking, that you don’t break anything. Because smashing up your drains really will require a plumber – stat!
6. Where’s that hose?
Your plumber may use an ultra-hot, ultra-high pressure, ultra-expensive version! But your garden hose may just suffice – just make sure it’s cranked up to the max!
Here are some tips:
Point the maximum water flow straight into the heart of the drain
Don’t worry if it makes a big, dirty, wet mess!
Once done, use another bucket of elbow grease with that drain rod again
Repeat.
7. How’s that blockage?
How did you go? Great success? Or do you need to find the number for a friendly local plumber?
If the answer to that final question was “unfortunately yes”, don’t stress too much! Here at Sydney’s favourite outside drain unblocker, we absolutely love cleaning drains in Sydney of every kind and complexity – and we do it all with a smile on our faces!